Congratulations! You've reached the final stage of developing your Ember app: it's time to deploy it to a server so that everyone can start using it!
There are many ways that you can deploy your application. In this chapter we're going to use Heroku.
Set up Heroku
The first thing you need to do, if you haven't yet, is create a Heroku account (don't worry, it's free)!
Next, you need to install the Heroku Toolbelt on your computer. Just follow the instructions on the page and log in with your credentials in their command line tool.
Now, make sure that you're in the Chirper Ember folder and run this command to create your Heroku app using the Ember Heroku Buildpack (the namespace my-chirper-appneeds to be unique, so you're going to have to come up with your own name):
heroku create my-chirper-app --buildpack https://github.com/tonycoco/heroku-buildpack-ember-cli.gitYou can deploy to Heroku using simple Git commands, which is awesome. If you haven't commited anything in your project yet, we'll do it now:
git add .
git commit -m "Ready for deployment"
And finally, we push the application to the Heroku server:
git push heroku masterThis might take a few minutes, so just sit tight and let the buildpack do it's thing. The first deploy is always a little extra long since Heroku will cache the node_modules directory in order to speed up future builds.
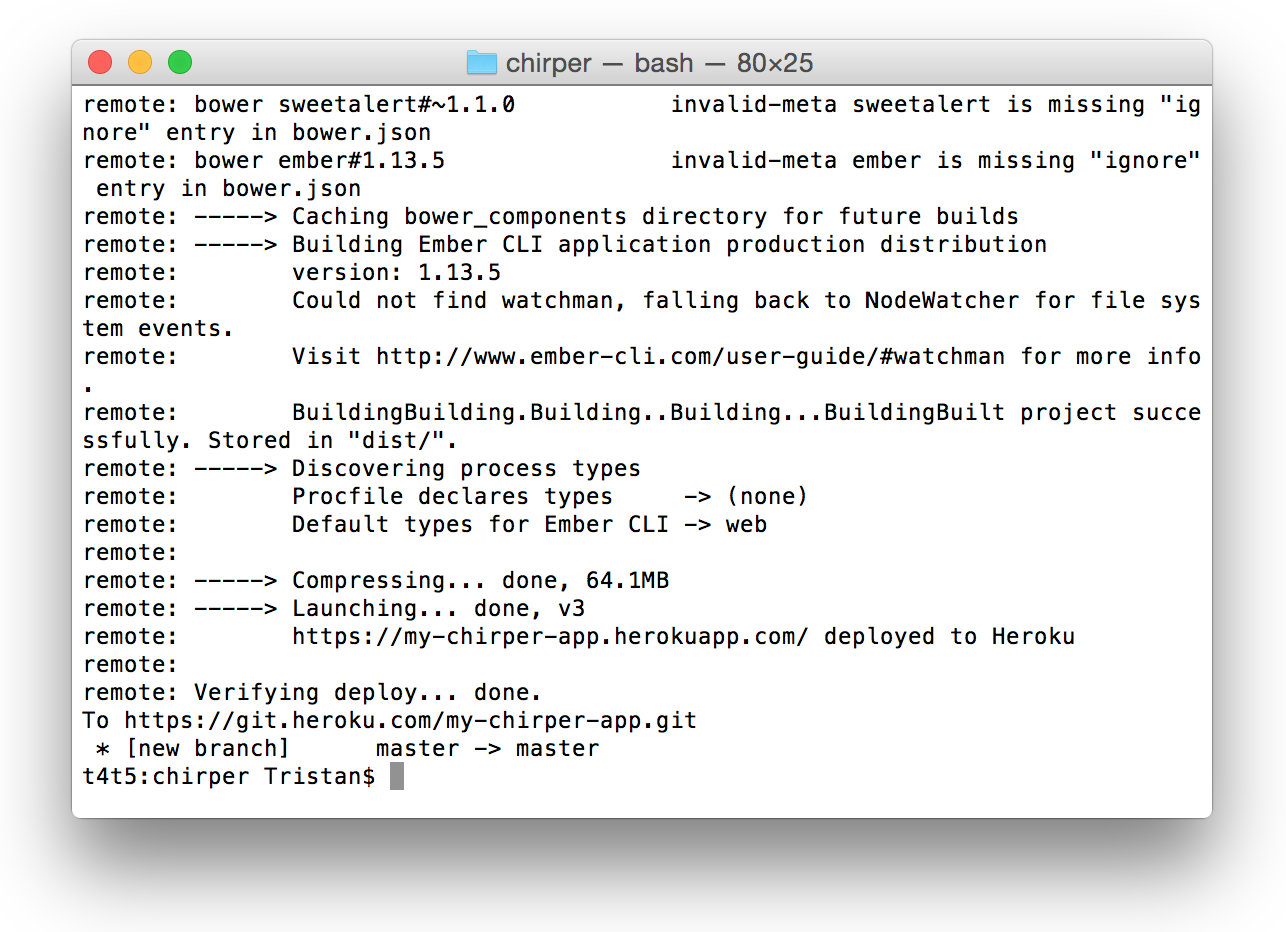 What you should see once the deploy is done!
When it's done, visit http://{your-app-namespace}.herokuapp.com(in my case, it will be my-chirper-app.herokuapp.com) and you should see your web app, live!
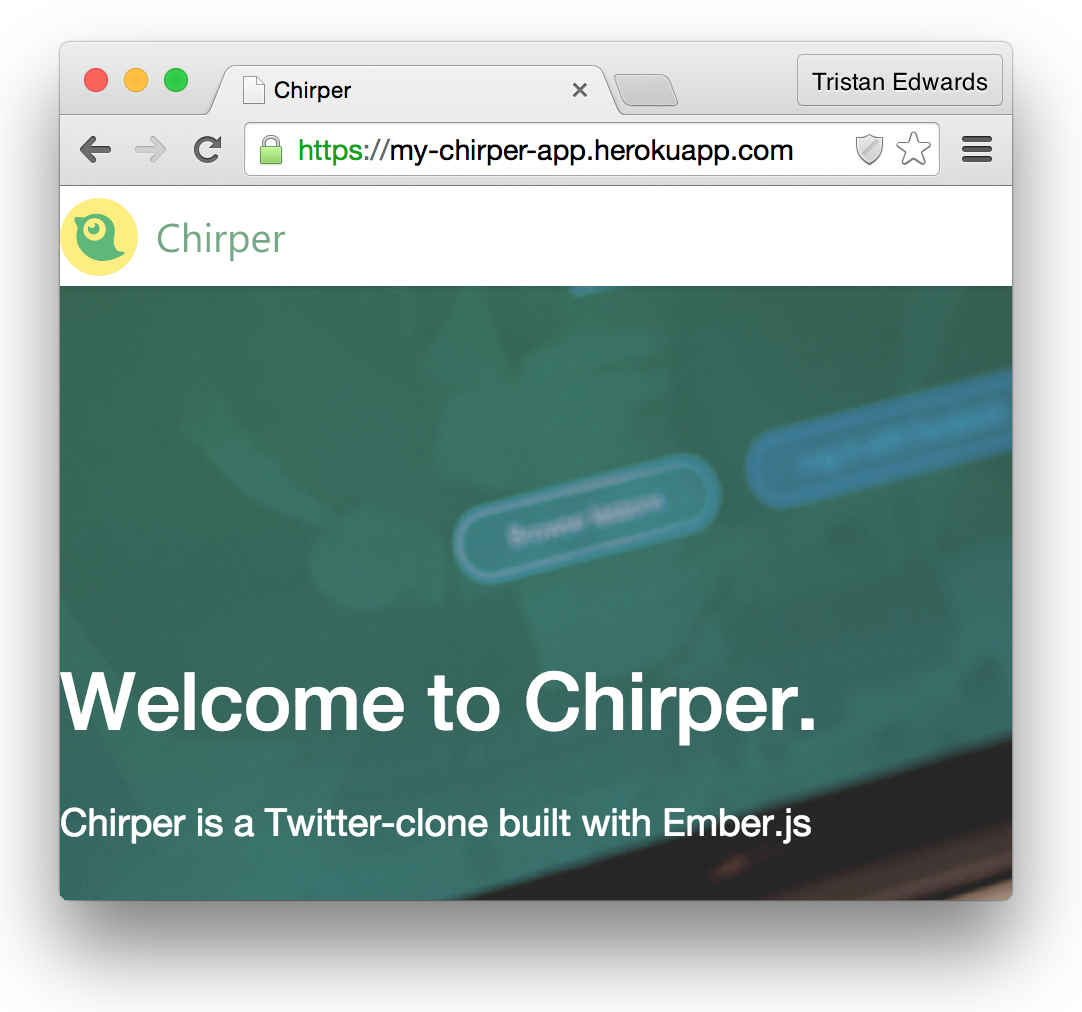 Wohoo!
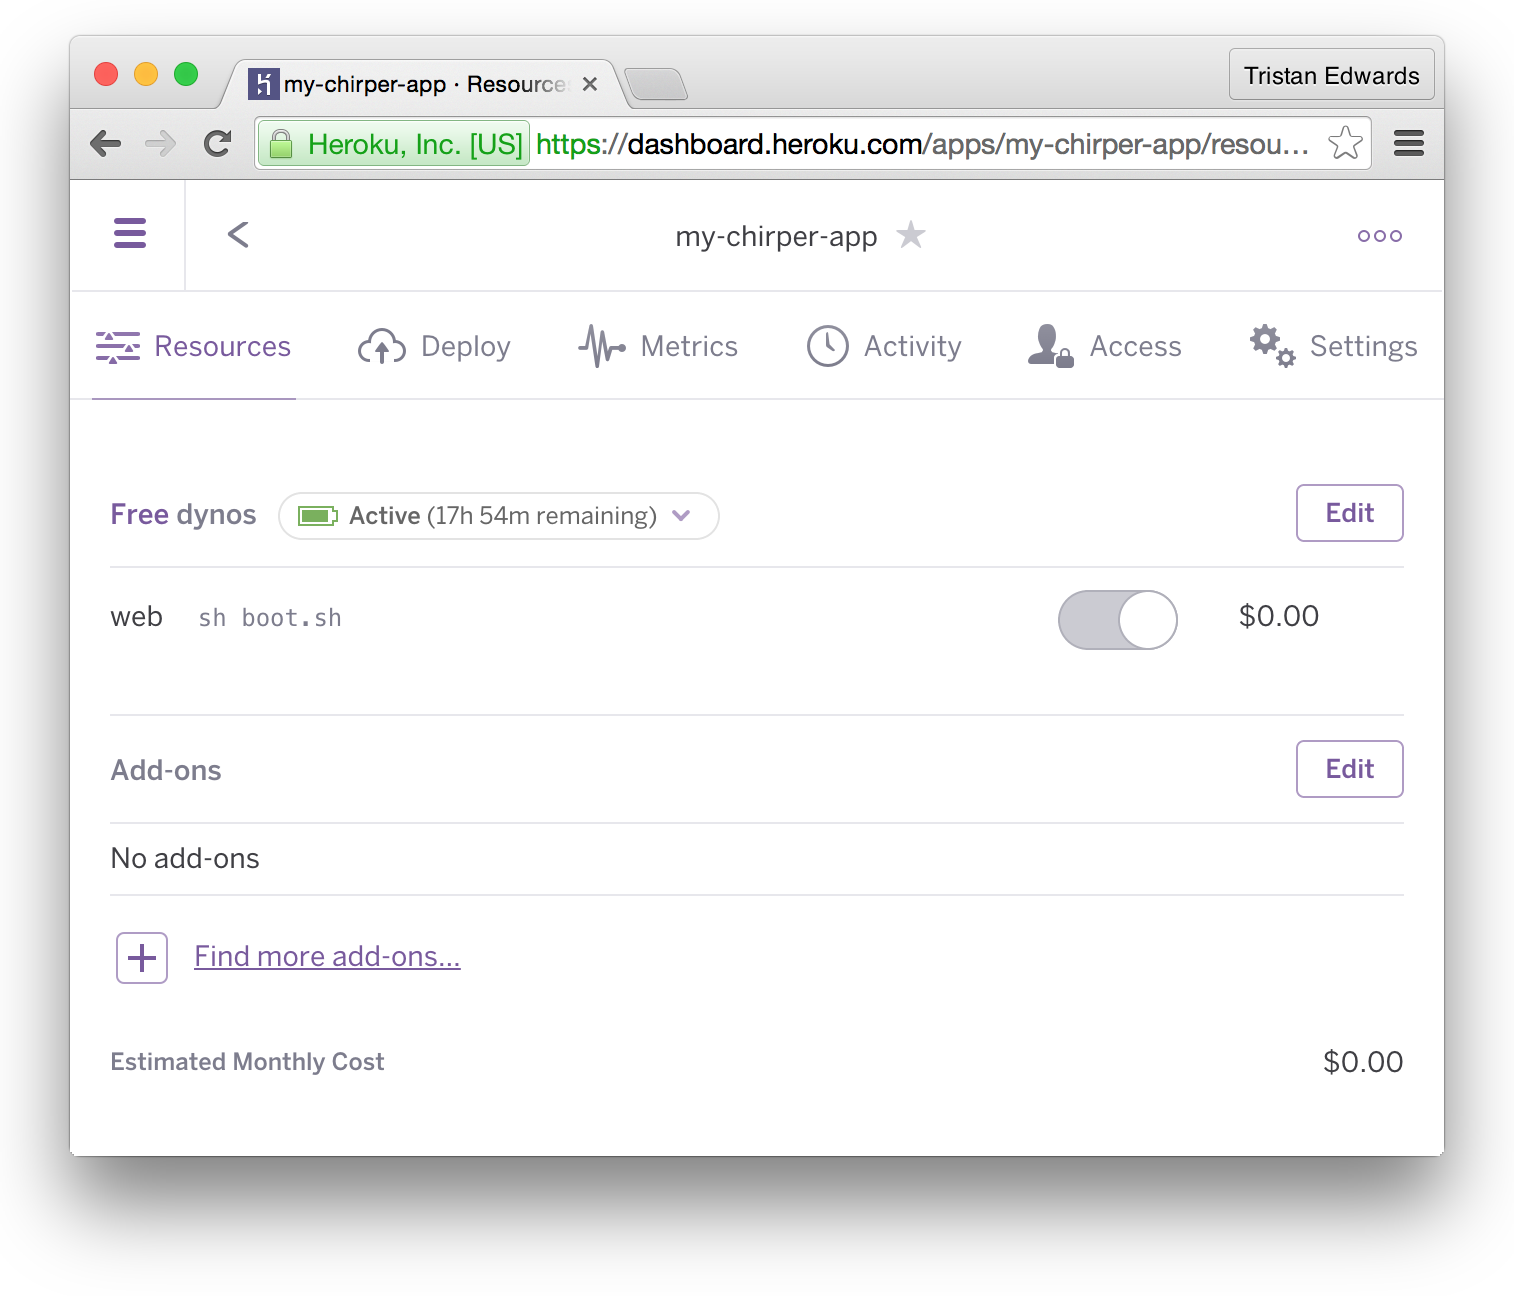 If you log in to Heroku.com, you can find more info about your app (by the way, Heroku's dashboard is built in Ember!)
Deploying the API
There's an important piece still missing, namely the API! If you try to log in or sign up, you'll notice that nothing happens, so let's deploy our November app as well!
We'll start by going back to our November directory in the terminal, and create a Heroku app for it (remember, choose a unique namespace):
heroku create my-chirper-apiNext, we commit and deploy a first version of the app:
git add . && git commit -m "Ready for deploy"
git push heroku master
When it's done, you can check out your app in the browser by running heroku open.
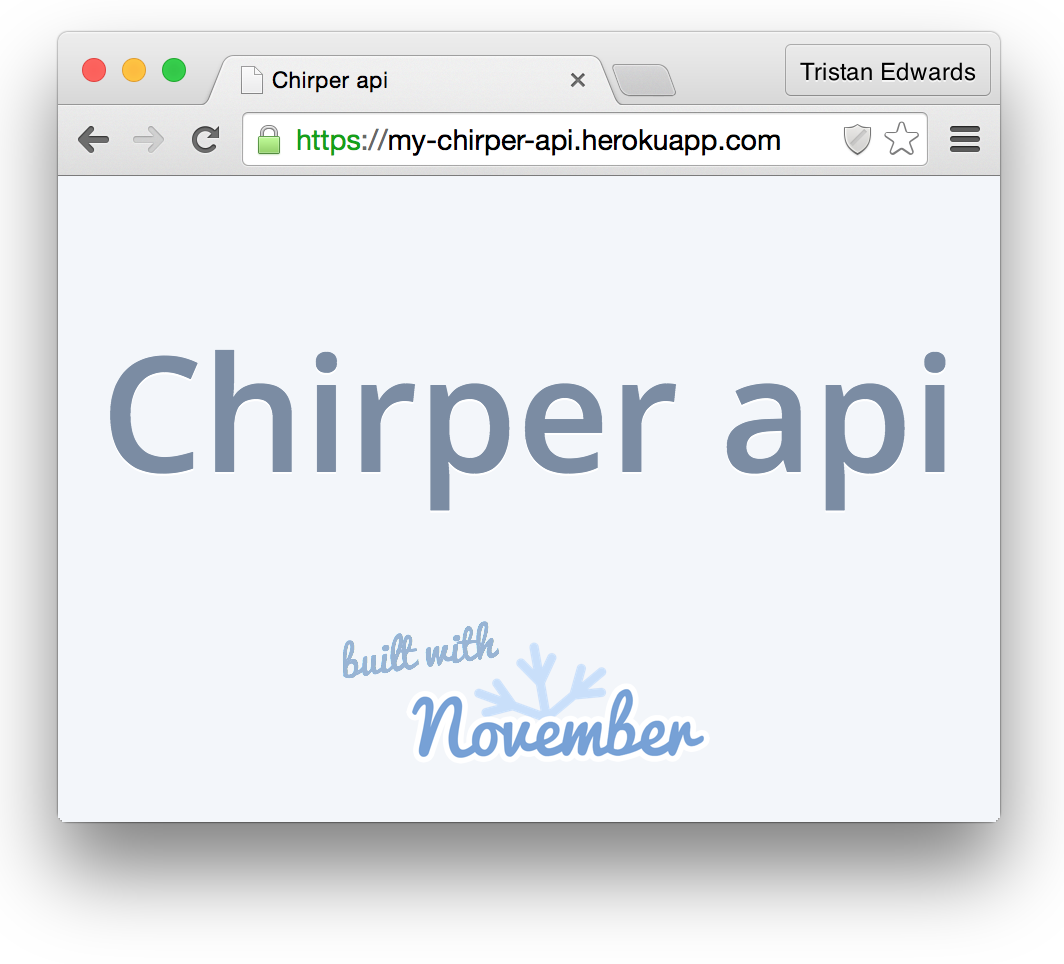 There's our API!
Right now, our live API isn't linked to any production database though.
Heroku uses PostgreSQL as their default database, which Sequelize (and therefore November) supports out of the box. This allows us to use a PostgreSQL database in production while still using MySQL when we develop locally. Sweet!
Let's add a database to our app by going back to the Heroku Dashboard:
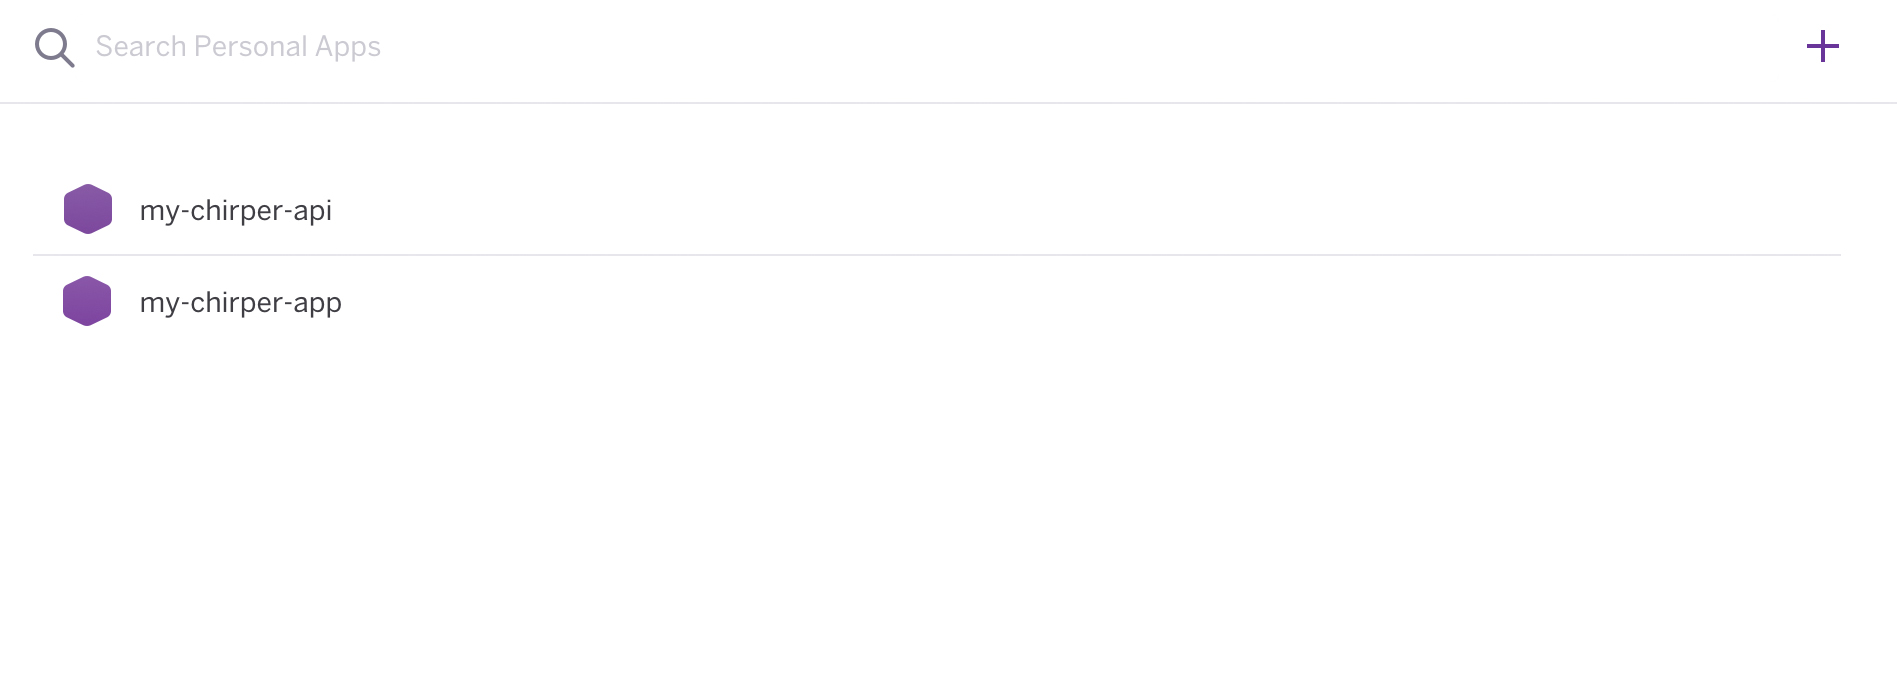 In the dashboard, click on "my-chirper-api"
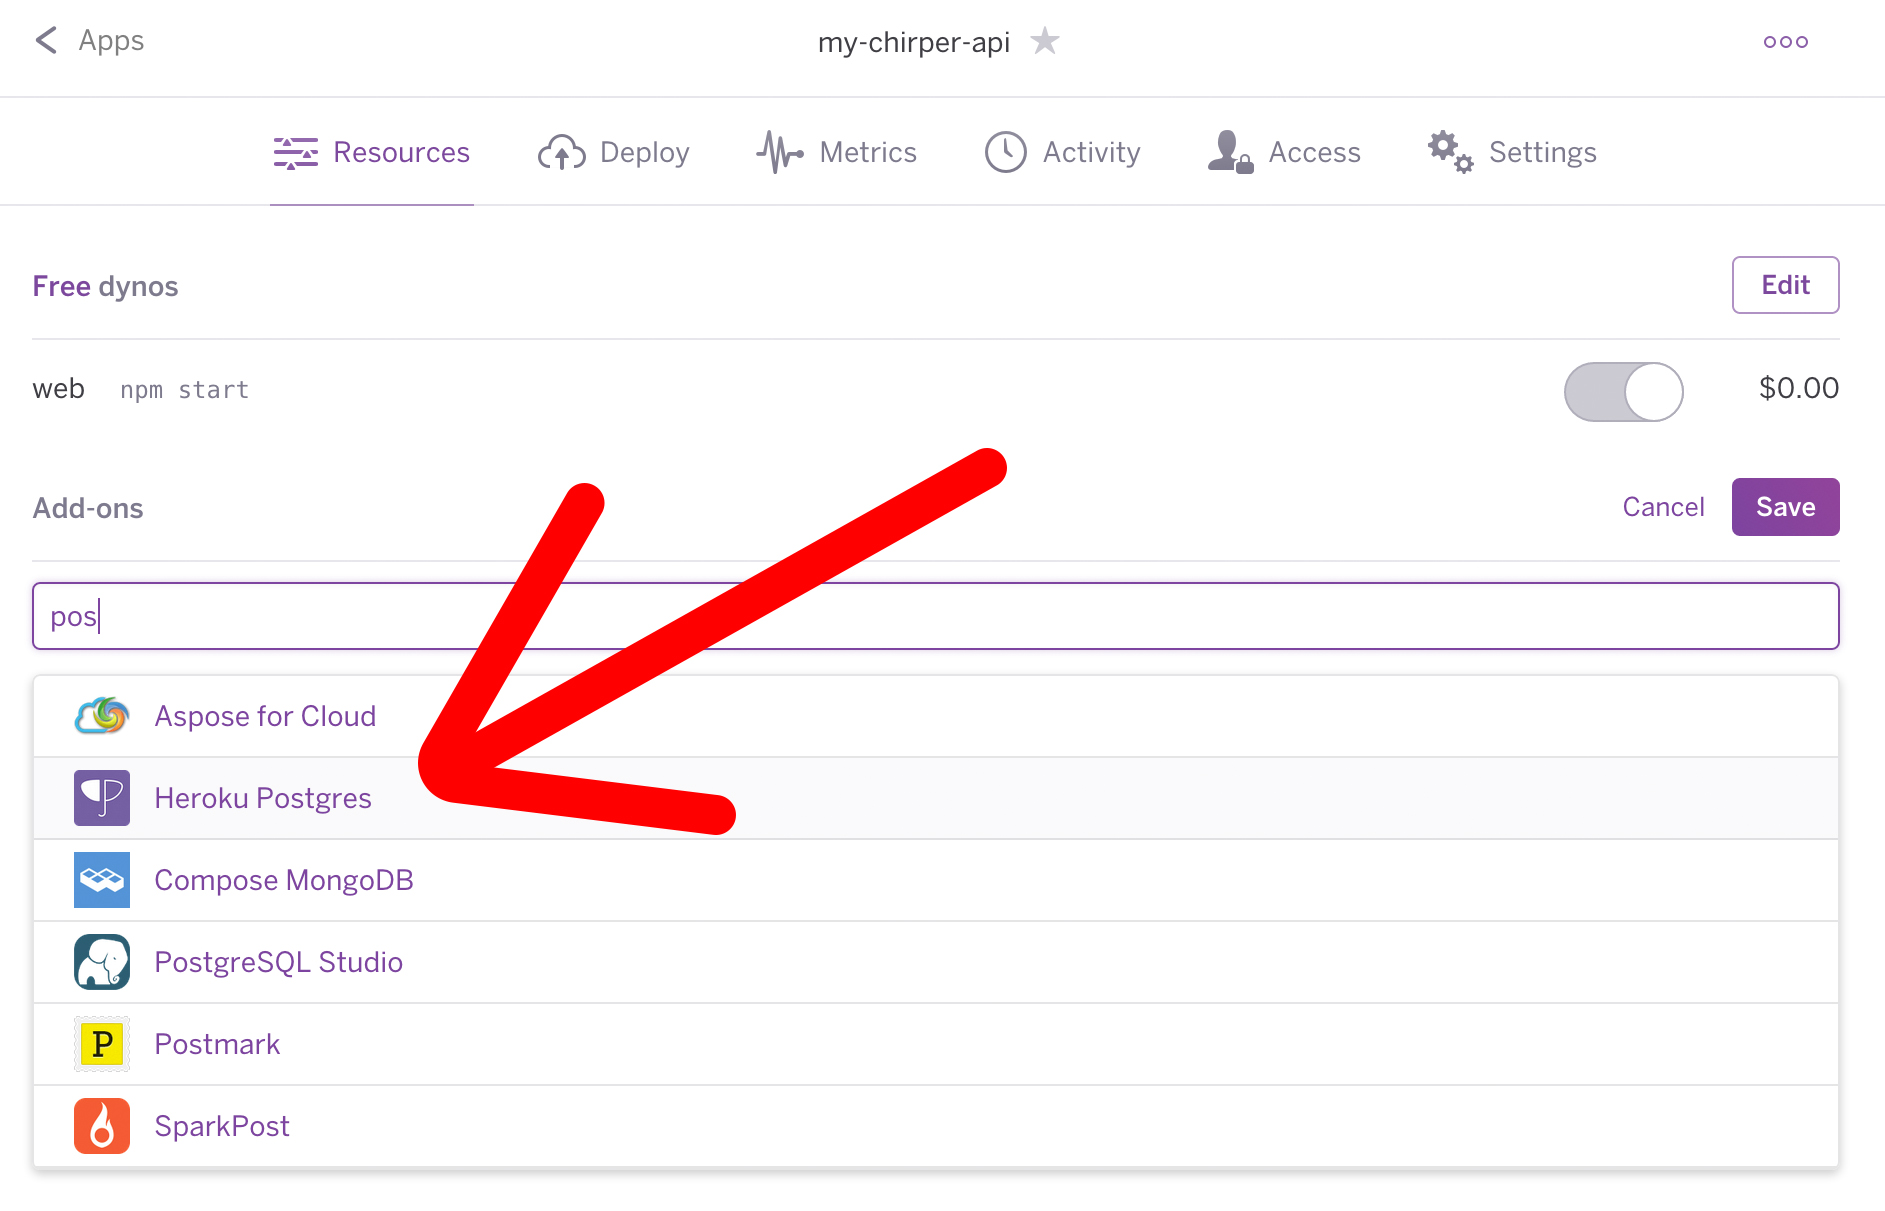 In the Add-ons section, click on the "+"-button. Search for "postgres" and you should find the "Heroku Postgres" add-on. Click on it, then click "Save".
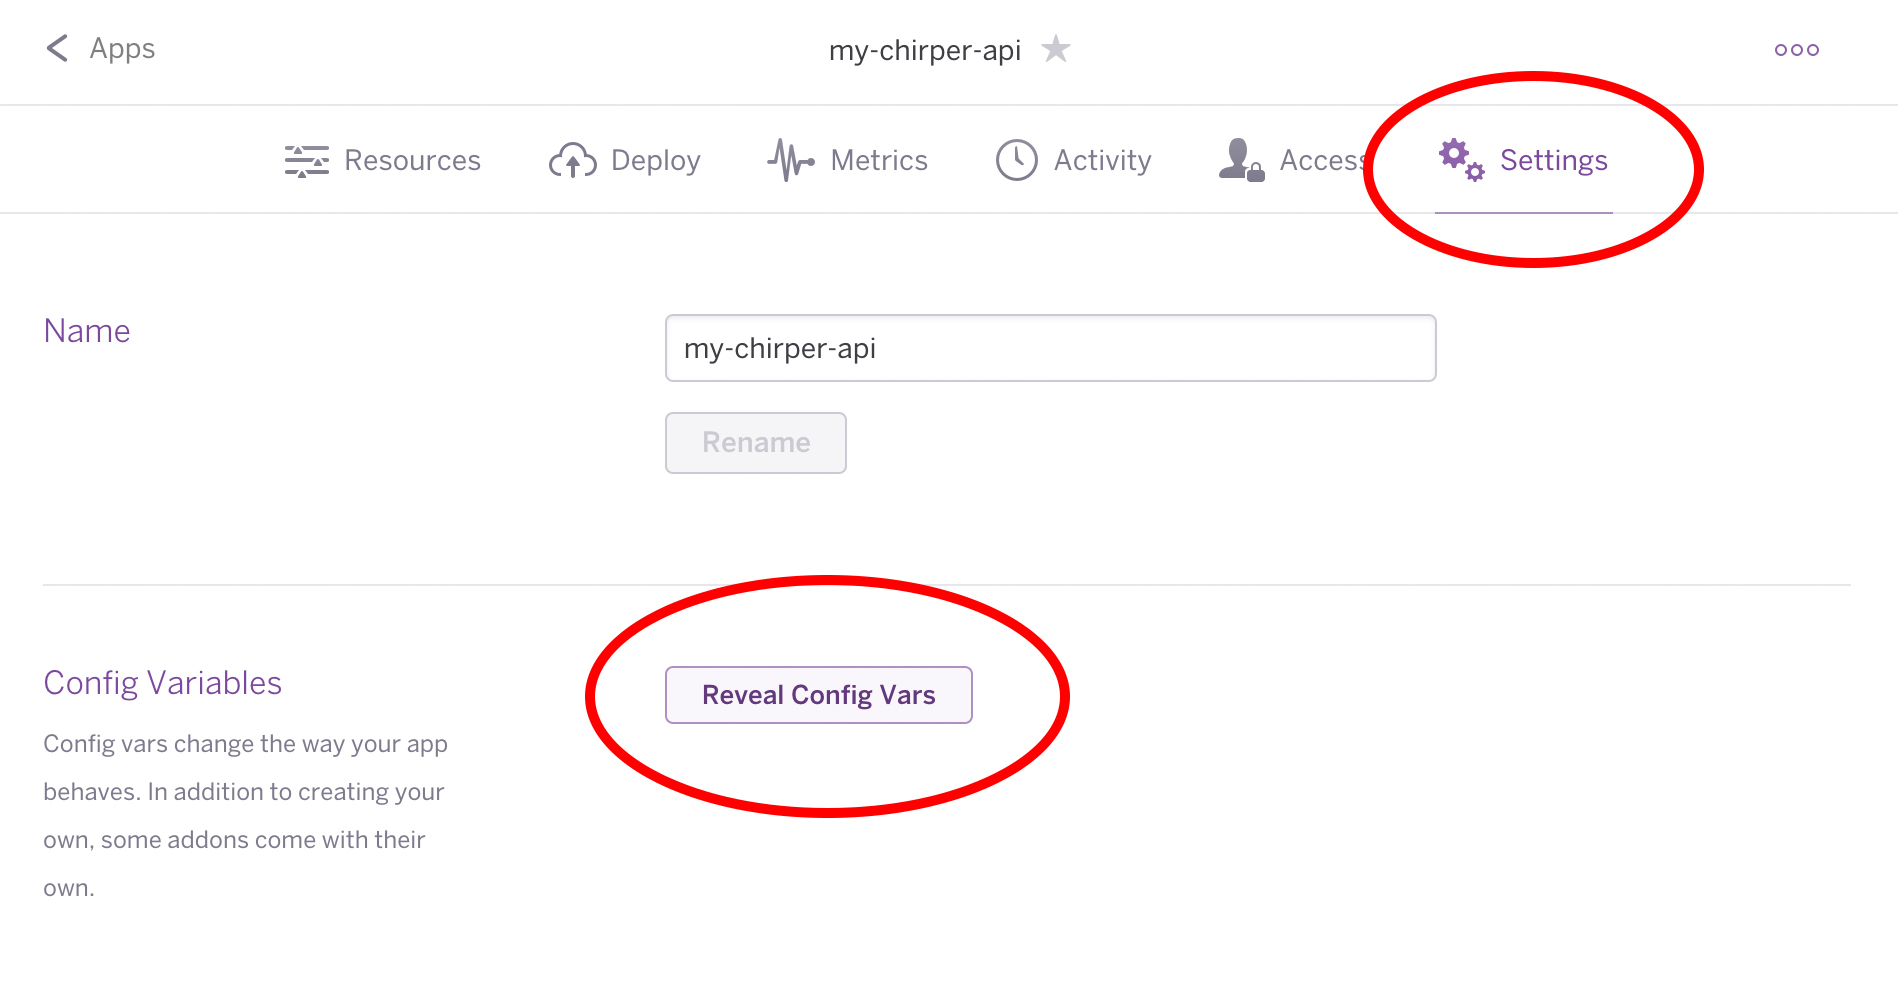 After that, navigate to the "Settings" tab and click on "Reveal Config Vars"
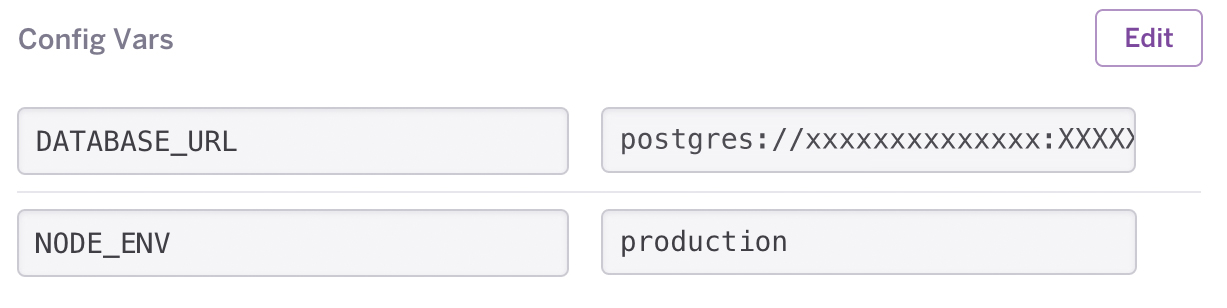 Copy the DATABASE_URL field that Heroku has added, and also make sure that you add a key called "NODE_ENV" with the value "production" (so that November knows which database setting to use)
Before we redeploy, we need to specify the allow_origin in November's config-file (under the production key), so that our Ember app can make AJAX requests to our API in production:
// config/config.json

"production": {
  "use_env_variable": "DATABASE_URL",

  // Make sure your put YOUR Ember app's Heroku URL here
  "allow_origin": "https://my-chirper-app.herokuapp.com/"
}
Alright, let's redeploy this!
git add . && git commit -m "Fix env config"
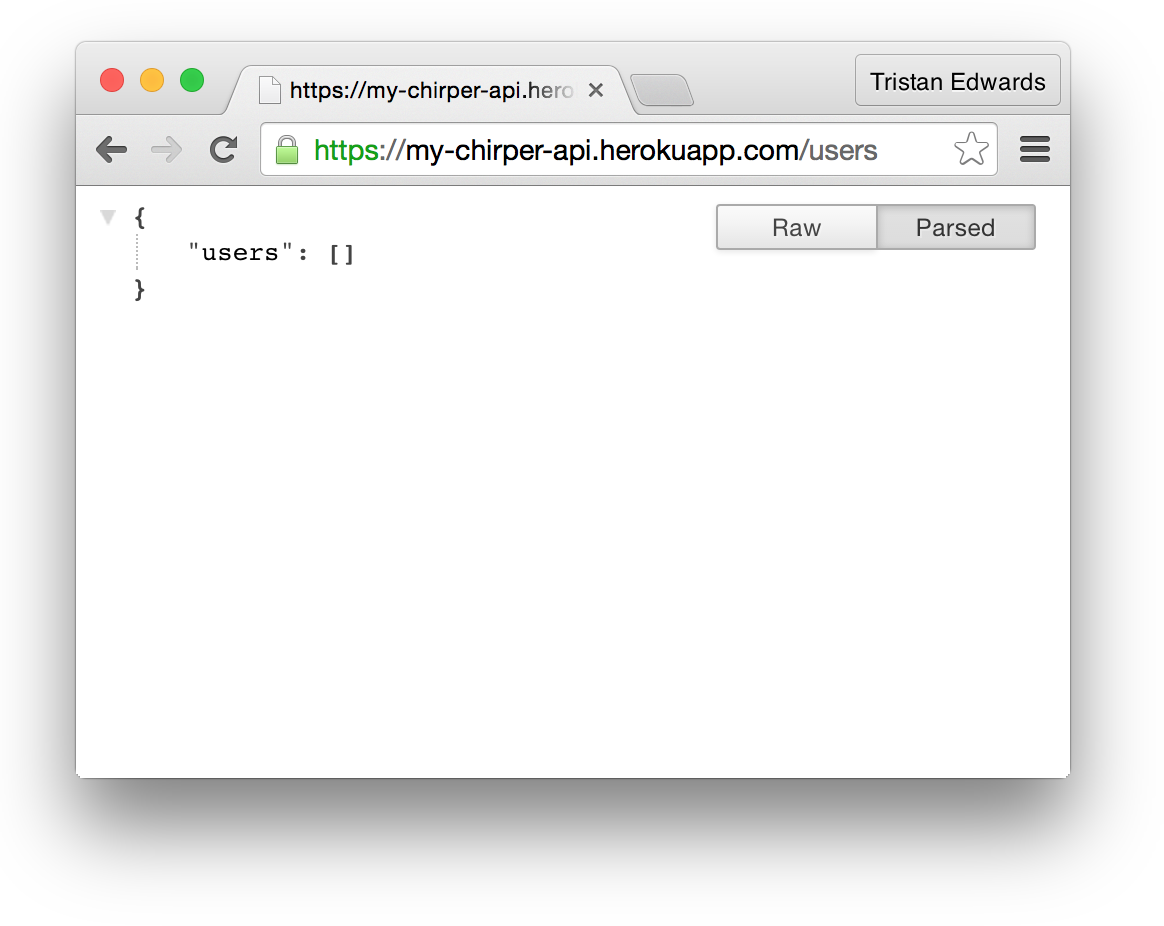
git push heroku masterAfter it's done, visit https://{your-api-namespace}.herokuapp.com/users and if you see an empty array, that means that the database tables were created successfully!
Fixing the Ember app
Finally, we need to set some environment variables for the API URL in our Ember appas well, so that it connects to the Heroku URL instead of localhost:9000 when we ship it.
// config/environment.js

// At the bottom of the file:
if (environment === 'production') {
  ENV.apiURL = 'https://my-chirper-api.herokuapp.com';
  ENV.contentSecurityPolicy['connect-src'] = 'https://my-chirper-api.herokuapp.com';
  ENV['simple-auth'].crossOriginWhitelist = ['https://my-chirper-api.herokuapp.com'];
  ENV['simple-auth-oauth2'].serverTokenEndpoint = 'https://my-chirper-api.herokuapp.com/token';
}
Commit and redeploy your Ember app:
git add . && git commit -m "Fix production env"
git push heroku master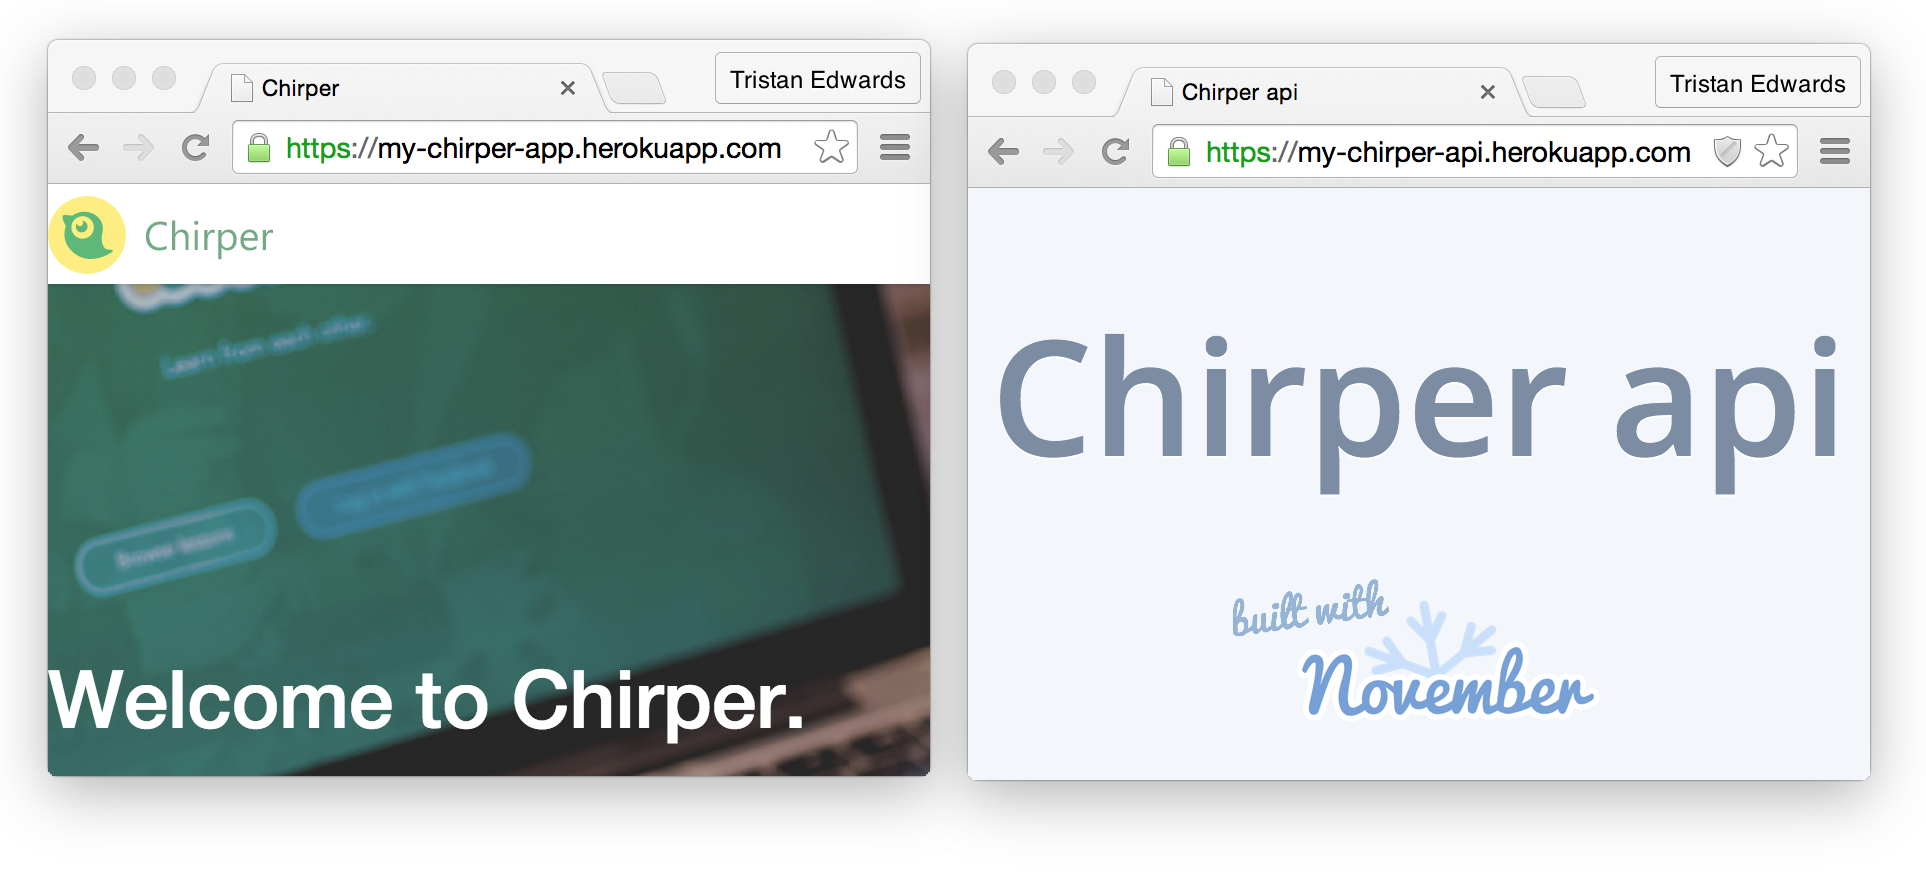 When that is done, both your Ember app and your API should be fully working!
That's it! Now your app is deployed with a working API and you can take some time off to CELEBRATE!
 Congratulations!