We're now ready to start our project! In this lesson we'll go through what it is we want to build, we'll initialize the Ember app, and finally take a look at the file structure so that we know what we're doing.
What we want to build
In this course we will create a web app called Chirper, a simplified clone of Twitter, using Ember.
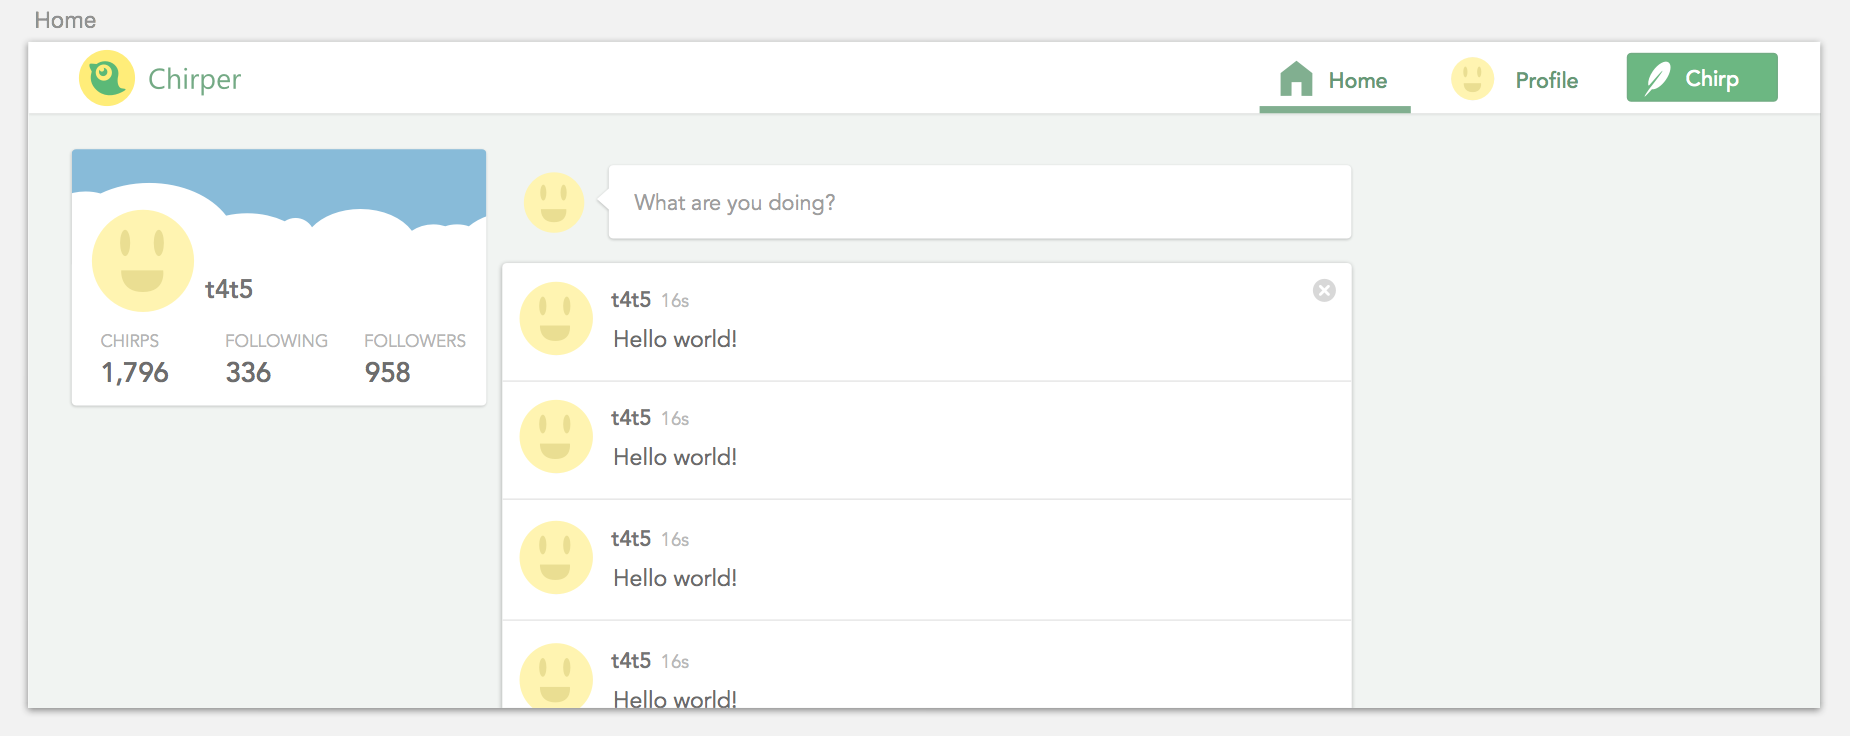
It might not be the most original-looking thing in the world, but it's a great way to learn!
Why would we want to create a Twitter clone you might ask? In my opinion, Twitter is a very simple service that most of us understand, but it also has the most important partsof an ambitious social application:
-
Authentication (the ability to create a new user, log in, and stay logged in)
-
Posting new items (in this case, tweets) and getting a list of those
-
Setting up a profile
-
The ability to follow and unfollow other users
A good starting point when beginning a new project is to first draw some wireframes of the interface and create **high-fidelity mockups **in a program like Sketch or Photoshop. However, this is not a prototyping course, so I have already done that for you!
If you have Sketch for Mac, feel free to download the following file and take a peak at what we'll build:
Download chirper.sketch
Create a new project with Ember CLI
Time to bring up the terminal again. cd your way into the directory you want to put your project folder in, and then run:
$ ember new chirperThis will automatically create a project folder called chirper for you, with all the necessary dependencies.
 Don't worry if this goes on for a while. Just let it run. It can take a few minutes.
When it's done, go into the folder and launch the Ember server to see your newly created project in action!
# Go into the project folder
$ cd chirper
# Launch the Ember server
$ ember server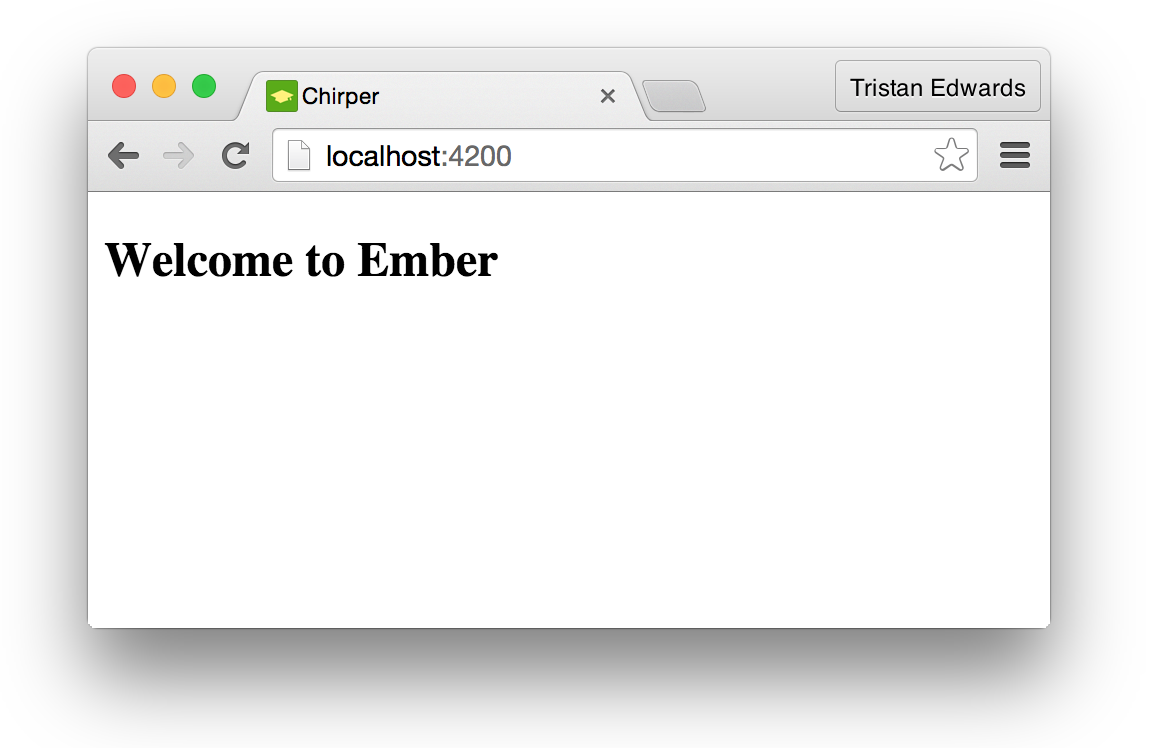 After the build, this is what you should see if you go to localhost:4200 in your browser
Understanding the file structure
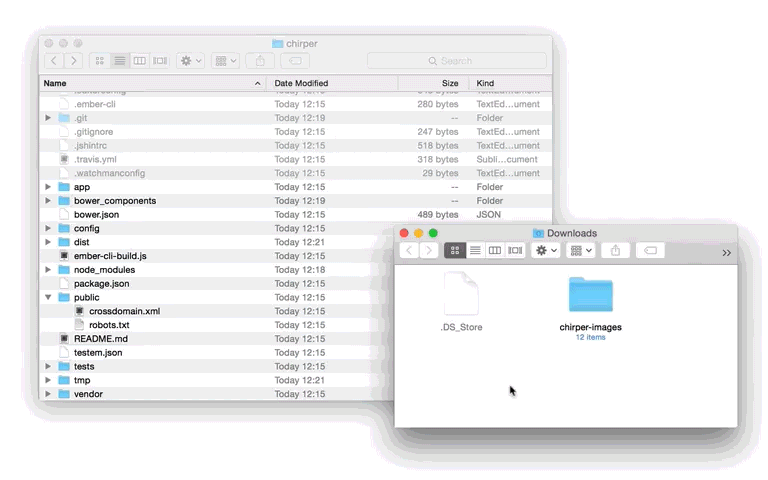
Alright, let's dive into the project folder that Ember has created for us and go through its contents file by file! Don't worry if some of the explanations seem a little confusing right now, we will understand their purpose much better as we actually use them in our project.
-
app: this is the folder where you'll be spending by far most of your time. All of the templates, models, controllers, stylesheets, etc. reside in here. -
bower_components: where your bower dependencies get downloaded. -
bower.json: since thebower_components-folder isn't added in Git by default, it's this file that keeps track of your Bower packages and their versioning. -
config: global app configurations. Right now it only contains anenvironment.jsfile, which let's you set special variables and behaviours that depend on if your app is in development, in testing or in production. -
dist: this contains the final result of your app, and is what's running in the background when you go to localhost:4200. You should never have to manually change the contents of this folder, since it's only a compilation of all the code you write elsewhere. -
ember-cli-build.js: this file let's you decide which external packages (from Bower for example) should be concatenated with the rest of your JavaScript code. It's basically a library importer. -
node_modules: same as thebower-components-folder, but for libraries installed through NPM. -
package.json: same asbower.json, but for libraries installed through NPM. -
public: this is where you put all of your static assets, like images, video clips and fonts for example. -
README.md: every good project contains a README-file to explain how the app works for collaborators. -
testem.json: configurations for your tests. -
tests: this is where all the logic for your QUnit tests resides. -
tmp: some temporary files created during the build process. This folder shouldn't be touched. -
vendor: here you put all the third-party libraries that can't be installed through NPM or Bower for whatever reason.
Adding the image assets
As you can see from the mockups, we're using a few images in our app, so make sure you download the following zip-file, unzip it, and put the content of the folder in public/images.
Download
In the next chapter, we will write some of our own code for the first time to see how Ember works.