Elixir's speed, concurrency and simple syntax makes it into a very attractive language for web programming. In this chapter, we'll get started with Elixir's most popular web framework -- Phoenix!
To give you some background...
Phoenix was created in 2014 by programmer Chris McCord, and aims to be the "web interface" for your Elixir app.
If you want to know more about Chris' motivations and goals for the framework, check out this video from ElixirConf 2014:
Installing Phoenix
Phoenix can be installed using the Mix command line tool. But first, we need to install the Hex package manager! This is similar to NPM in Node or RubyGems in Ruby:
mix local.hexNow that we have Hex, we can install all the dependencies needed in our Phoenix app. Let's go ahead and install Phoenix with Mix:
mix archive.install https://github.com/phoenixframework/archives/raw/master/phoenix_new.ezWe also want to install the new Mix task phx to generate files for our project. This requires a separate install command right now, but will be the default once Phoenix 1.3 is out of beta (which should be very soon):
mix archive.install https://github.com/phoenixframework/archives/raw/master/phx_new.ezUsing Postgres

We're also going to need a database for our project. Phoenix and its database wrapper -- Ecto -- use Postgres by default (although it supports many other database systems too)
If you haven't installed Postgres on your computer, I recommend that you download Postgres.app (if you have a Mac) and follow the install instructions to get started.
What we want to build
Throughout the rest of this course we'll be using Phoenix to build a webapp called Messengyr – a simplified clone of Facebook Messenger.

Messengyr = Messenger + Gyr (a type of bird). Nifty huh?
Our application will only have 3 views:
-
Landing page
-
Login
-
Messenger interface (where the majority of the logic will be)
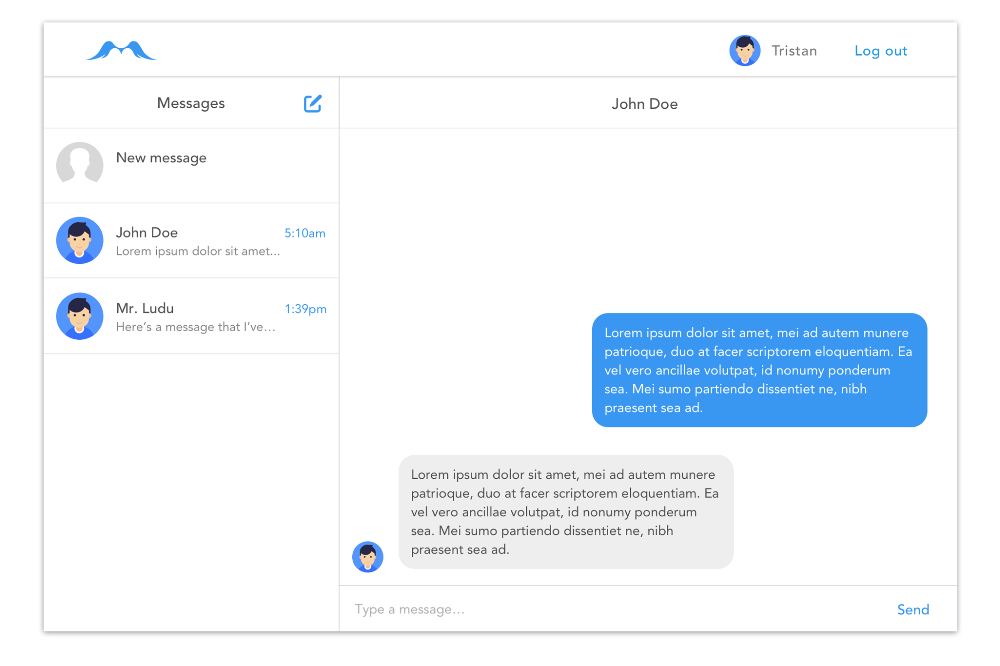 A little preview of what we want to build.
You can also play around with the final result right here (it's a free Heroku app, so it might take a little time to load).
Creating your project
Let's create our "Messengyr"-project by running this new Mix command:
mix phx.new messengyrYou should now see all the files being created, and a line asking:
Fetch and install dependencies? [Yn]Just press "y" to install the framework's dependencies. This might take a little while, so during that time we can take a look inside the new "messengyr"-folder that Mix just generated for us!
What's in a project?
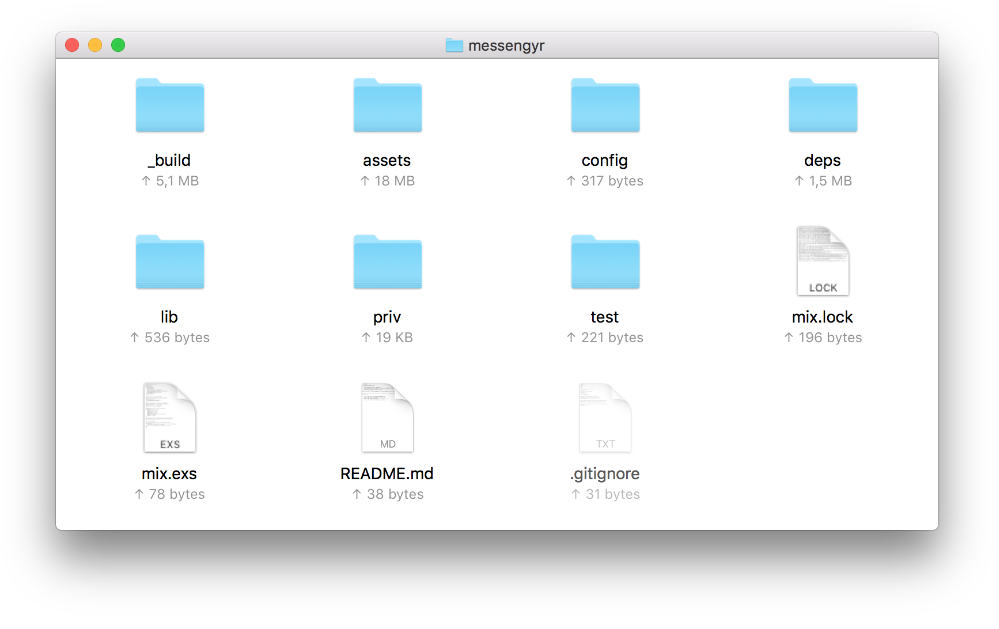 Some is familiar. Some is new...
It's worth noting that a Phoenix project is essentially just like any other Mix project, but with some extra goodies packed in. Chris McCord often points out that Phoenix is not your application, but just the "web interface" for your application (unlike a framework like Rails).
The folders config, lib and test, in addition to the mix.exs-file should all look familiar, since those files were also generated in your previous Mix program. What's different though is that the config-folder now comes with some predefined environment files (dev.exs, prod.exs...). Moreover, the test-folder also contains some default files and folders, and mix.exs has a list of preinstalled dependencies like Ecto and Postgrex, which we'll talk more about later.
Let's now go through some of the new folders that are unique for Phoenix projects. Don't worry if some of the descriptions below sounds overly-complicated for now -- you'll soon understand how every part works once we actually start working on our app.
-
lib: once again, this is where you'll spend by far the most time. It should contain amesssengyrfolder and amessengyr_webfolder. Themessengyr_webfolder is unique to Phoenix, and contains your routes, controllers, views and templates -- all of which we'll go through in the next chapter. -
assets: this is for all your static client-side files, such as images, CSS and JavaScript. It also contains all your NPM dependencies and lists them inpackage.json.Phoenix uses some of these Node packages to perform web-related tasks like transforming your files with Babel for example.There's also abrunch-config.js-file, since Phoenix uses the Brunch compiler by default to compile, **merge **and minify some of your files for maximum efficiency (you might be more familiar with competing tools such as Gulp or Webpack). -
deps: all your Hex dependencies go into this folder, both the ones that Phoenix has pre-installed and the ones that you might want to install in the future. -
priv: this folder contains three sub-folders:gettext,repoandstatic. All your static assets fromassetswill end up instaticafter they have been compiled (and possibly merged/minified).repohelps us set up our database structure, and we'll learn more about it in an upcoming chapter.
Running your project
Enough talking, let's run our newly created project! We navigate to our project folder with cd messengyr, and create the Postgres database that we'll be using for our app with this Mix-command:
mix ecto.createOnce that's done, we can start our server:
mix phx.serverPhoenix will take a little time to compile all the files the first time, but after a while you should see the line Running Messengyr.Endpoint with Cowboy using http://0.0.0.0:4000. Type in localhost:4000 in your browser and you should be greeted with this:
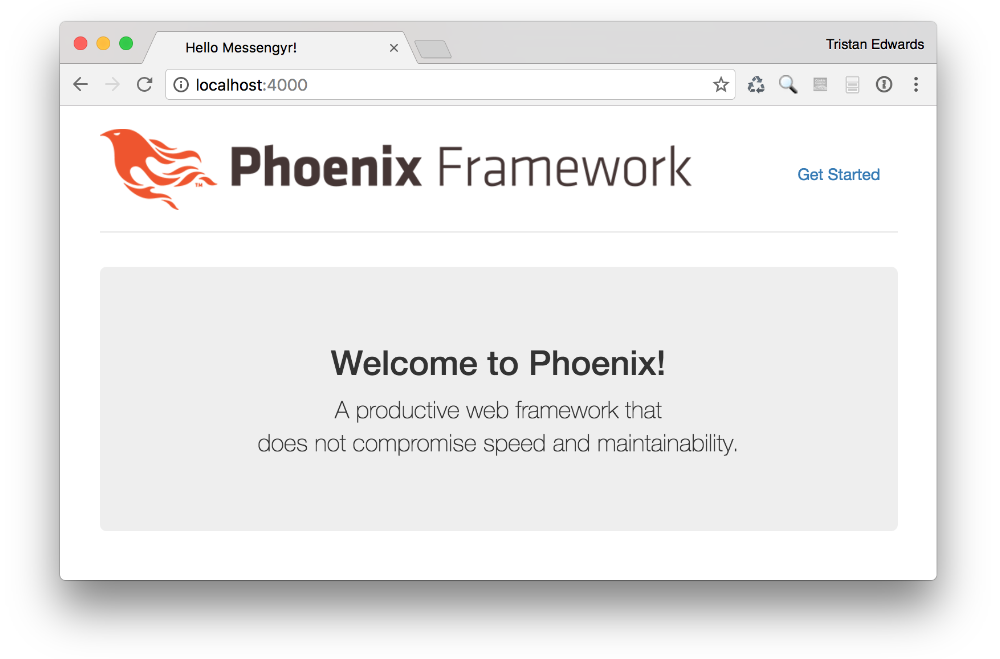
You did it! In the next chapter, we're going to learn more about the inner workings of Phoenix and create the first view for our app.