We now have our basic UI, and we have our first database table set up. What's left is some logic to send the data from the browser to the server, and finally to the database!
What's a changeset?
In order to add a row to a database table using Ecto, we should create what's called a changeset. This is a concept in Ecto that can be a bit confusing if you're used to an object-oriented language like Ruby or Python, where you have models and ORMs, but don't worry, it's not too difficult! Here's how it works:
-
We start out with a struct based on one of our schemas. If you come from an objected-oriented background, you can see this as a "model instance". Example:
%User{} -
We receive a map of the properties that should be changed. Example:
%{username: "tristan"} -
We call a changeset-function, where we pass in both the struct and the map as parameters. The function should return a special changeset struct, which determines if the properties you've set are valid.
-
If the returned changeset is valid, you can use it to insert or update the record in the database.
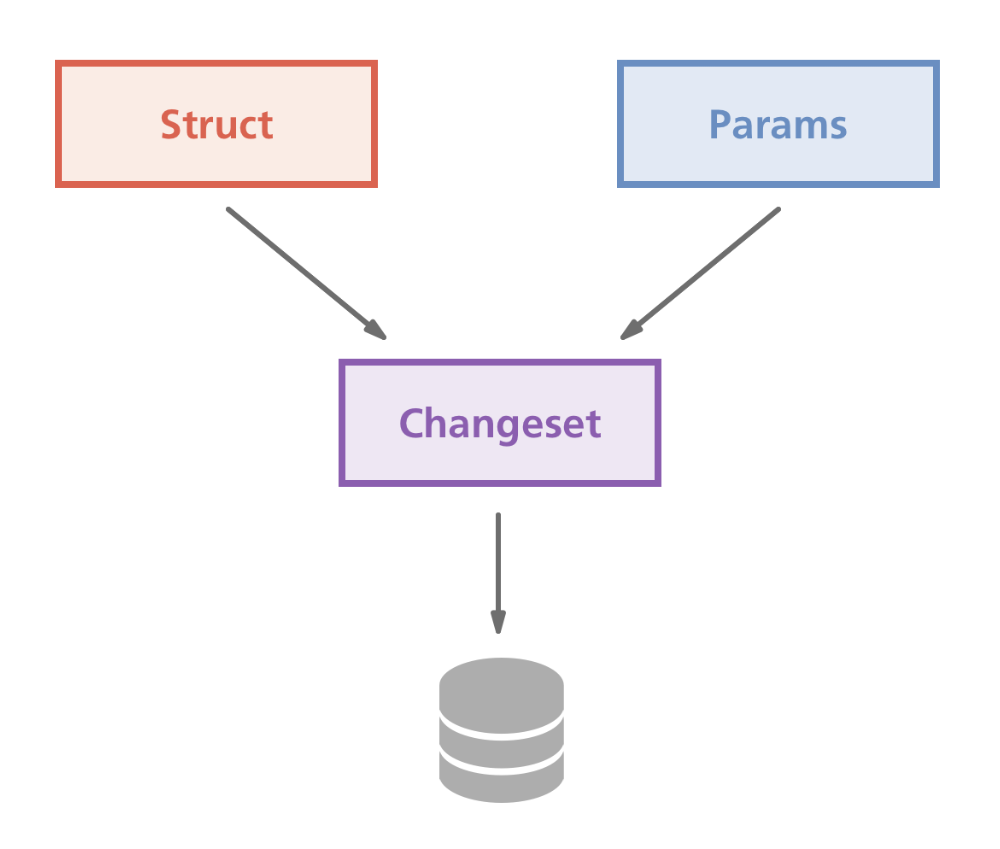 Here's a picture to illustrate the process better: your struct and your params are "merged" into a changeset, which is then used to update the database.
Trying out changesets in IEx
We can actually play with changesets if we run our Phoenix app (which, remember, is really just a Mix program) in IEx! Open a new terminal window and run the following command:
iex -S mixNow we can access all of our application's modules from IEx! Let's **create a new struct **based on the User schema that we created in the last lesson:
iex(1)> user = %Messengyr.User{}We can then use the Ecto.Changeset module, and its change/1-function to create a changeset from this user:
iex(2)> user_changeset = Ecto.Changeset.change(user)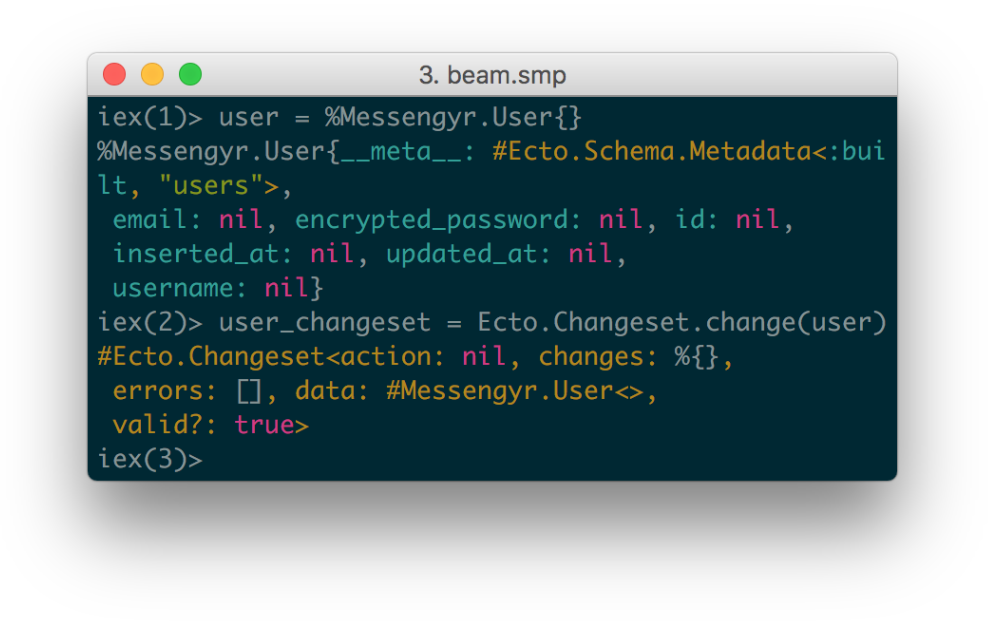 There's the changeset!
You don't need to know everything about how a changeset works. However, it might be interesting to examine some of its keys:
-
changeskeeps track of the changes you've made to youruser-struct since it was created or fetched. In this case there are none, so it's just an empty map. -
errorstells you if there are any detected errors in the changeset's fields (a wrongly formatted username for example). In this case there are none, so it's just an empty list. -
valid?is a simple boolean that becomesfalseif there are anyerrors.
We can now continue to build on this changeset! Let's add a username by using the change/2-function. The first parameter of the function is the changeset itself and the second one is a map with the fields that we want to add or change:
iex(3)> user_changeset = Ecto.Changeset.change(user_changeset, %{username: "tristan"})
So far, so good. You can see that the returned changeset's changes now include the new username value.
Finally, let's try to invalidate this changeset! For this, we're going to use the validate_required/2-function, which makes sure that our changeset contains certain fields and that their values aren't nil. Our changeset only contains a value for the username-field so far, so if we specify that it must also contain an email-field, the changeset will become invalid!
iex(4)> user_changeset = Ecto.Changeset.validate_required(user_changeset, :email)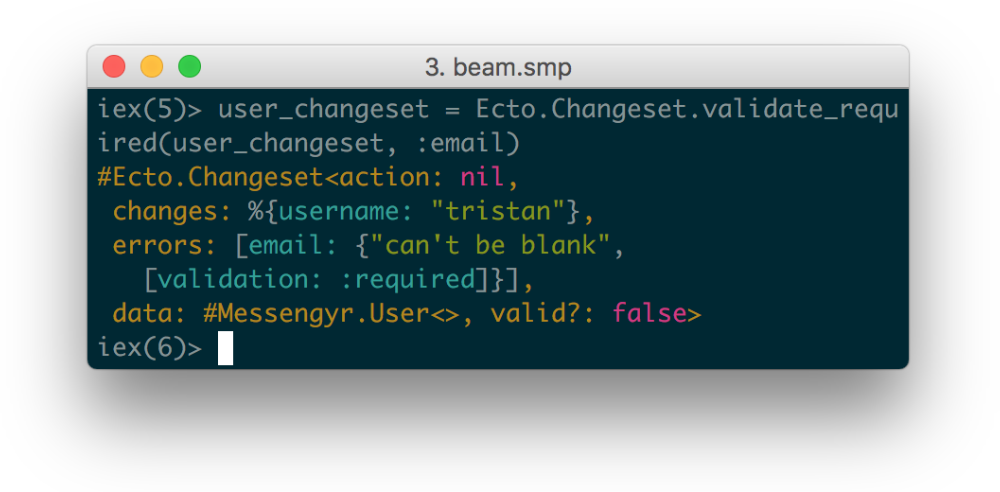 Notice how the "valid?"-field is now false?
If we try to insert this invalid changeset into our database using Repo.insert, you'll notice that we instead get a tuple containing the {:error}-atom and the invalid changeset:
iex(5)> Messengyr.Repo.insert(user_changeset)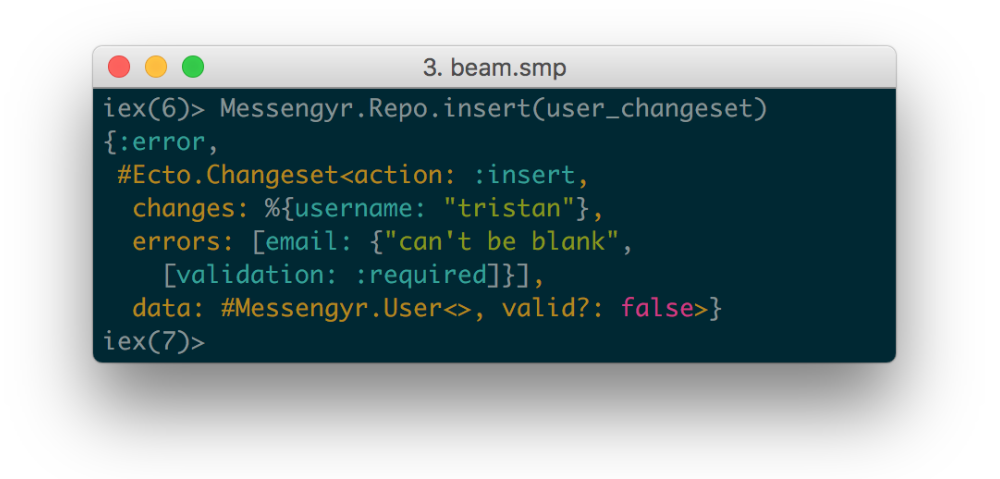 Sorry, no database insertion allowed!
And that's the gist of it! We start off with a struct, then we "transform" it into a changeset and apply all kinds of different checks to make sure that it's valid before we insert it into the database. Let's now put this into code in our actual app!
The registration changeset
We want to create a user whenever someone on the website sends a valid registration form. Therefore, it makes sense for us to have a special changeset that checks if the username is valid, if the password is long enough... etc, before inserting the new user into the database.
Let's create a new Accounts-module in the lib/messengyr-folder where we'll take care of everything related to the user accounts in our app. In it, we'll define an empty create_user/1-function that takes a params-map (containing the values that we want for our struct).
# lib/messengyr/accounts.ex

defmodule Messengyr.Accounts do

  def create_user(params) do

  end

end
Now, to warm things up, let's try to recreate the functionality that we had when we played around in IEx. We want to:
-
Create a user struct
-
Create a changeset from it
-
Set the username on the changeset with
change, using the value of the givenparams -
Check if the changeset has an email-field (which it won't) with
validate_required -
Return the changeset
To do this, we'll first import Ecto.Changeset at the top of the module. That way, we can just write validate_required instead of Ecto.Changeset.validate_required when we call the function. We'll also alias Messengyr.User so that we can create a new user struct with %User{} instead of %Messengyr.User{}. Here's what our file and function should look like, after we've added these shorthands:
# lib/messengyr/accounts.ex

defmodule Messengyr.Accounts do

  import Ecto.Changeset
  alias Messengyr.User

  def create_user(params) do
    # Create a user struct:
    user = %User{}

    # Create the changeset and do some validation:
    user_changeset = change(user, %{username: params.username})
    user_changeset = validate_required(user_changeset, :email)

    # Return the changeset
    user_changeset
  end

end
Restart IEx so that our module compiles, and let's try to call this function!
iex(1)> Messengyr.Accounts.create_user(%{username: "tristan"})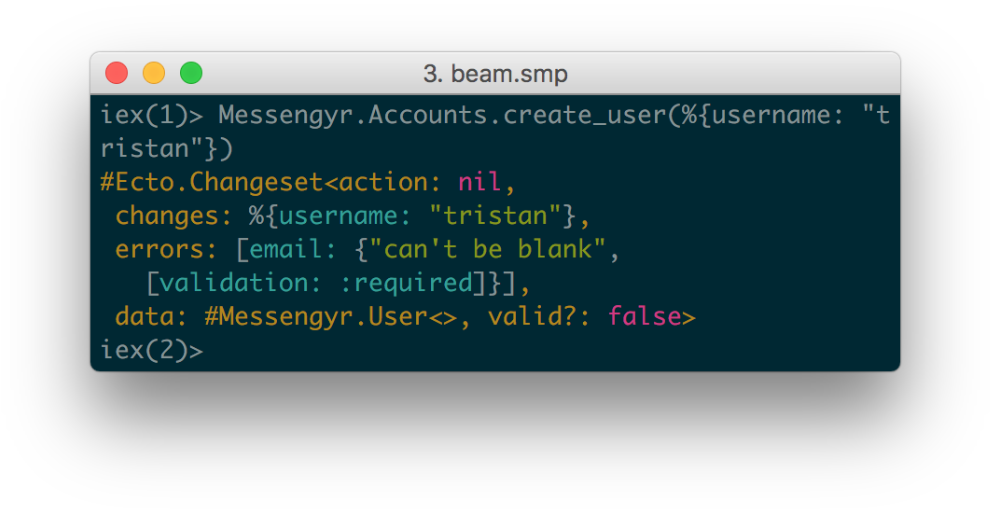 It works!
We get the same result as before: an invalid changeset with a username field. Alright, now that we know that it works, let's improve our create_user/1-function! The first thing we can do is use the awesome pipe operator, since we're always passing the result of the previous function as the first parameter to the next!
# lib/messengyr/accounts.ex
 # ...

  def create_user(params) do
    %User{}
    |> change(%{username: params.username})
    |> validate_required(:email)
  end

  # ...
If you want, you can restart IEx and try the function again, and you'll see that it still works in exactly the same way.
Next, we expect the user to not only send us their desired username, but also their email address and desired password. We could read all of these from params separately and set them with change, but Ecto has an even better function for it -- cast/3. Here's how we use it:
# lib/messengyr/accounts.ex

# ...

  def create_user(params) do
    %User{}
    |> cast(params, [:username, :email, :password])
    |> validate_required(:email)
  end

  # ...
The cast function takes the params-map then looks at the list of atoms ([:username, :email, :password]) to know which of the param values to apply to the changeset. This list of atoms can be seen as a whitelist -- if there's a key in "params" that's not in this whitelist, it will not be applied to the struct.
Again, let's try out the function in IEx. To avoid having to restart to get the new version of your app, you can just call the recompile()-function:
iex(1)> recompile()
iex(2)> params = %{username: "tristan", email: "tristan@ludu.co", password: "pa55w0rd"}
iex(3)> Messengyr.Accounts.create_user(params)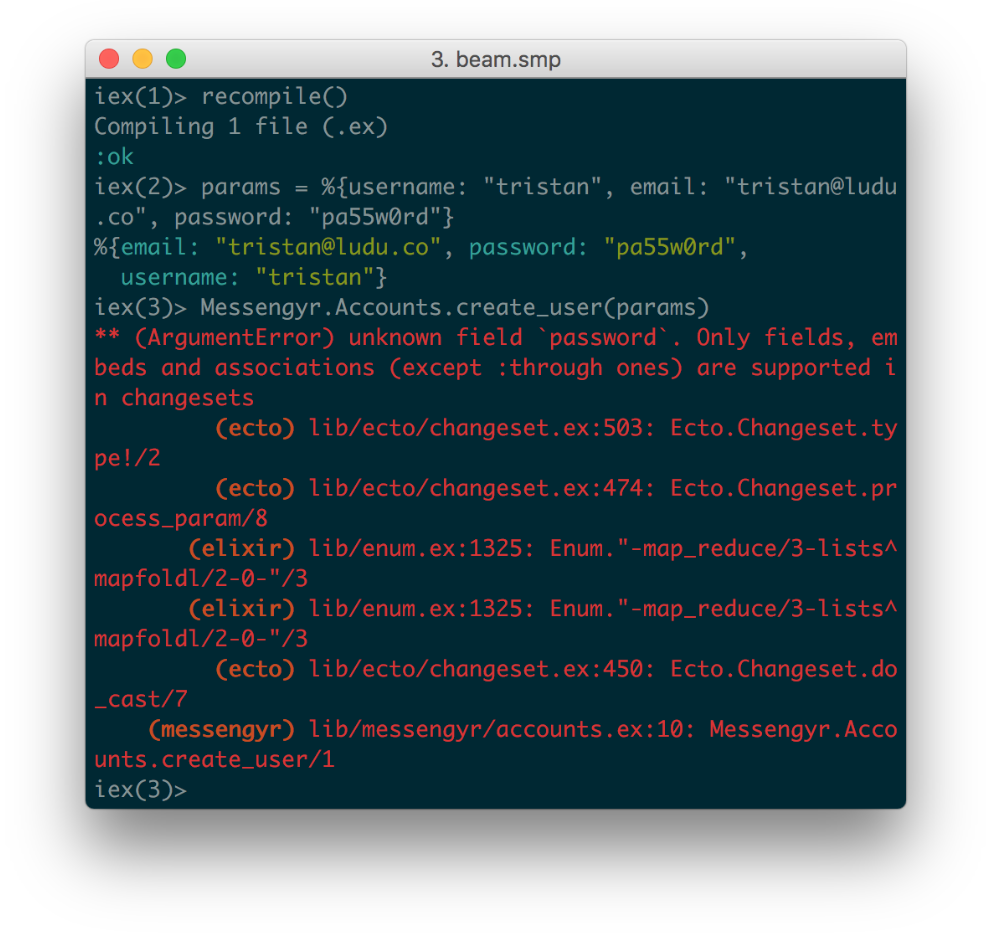 Oh no! An error message!
The reason we get an error message is because our User schema doesn't have a password-field, it only has encrypted_password, which confuses the cast/3-function!
To fix it, we can add password as a virtual field in our schema. That way, we can still use it in our changesets, but it's not persisted in the database:
# lib/messengyr/user.ex
defmodule Messengyr.User do
use Ecto.Schema
schema "users" do
field :email, :string, unique: true
field :encrypted_password, :string
field :username, :string, unique: true
field :password, :string, virtual: true # Add this line!
timestamps()
end
# ...
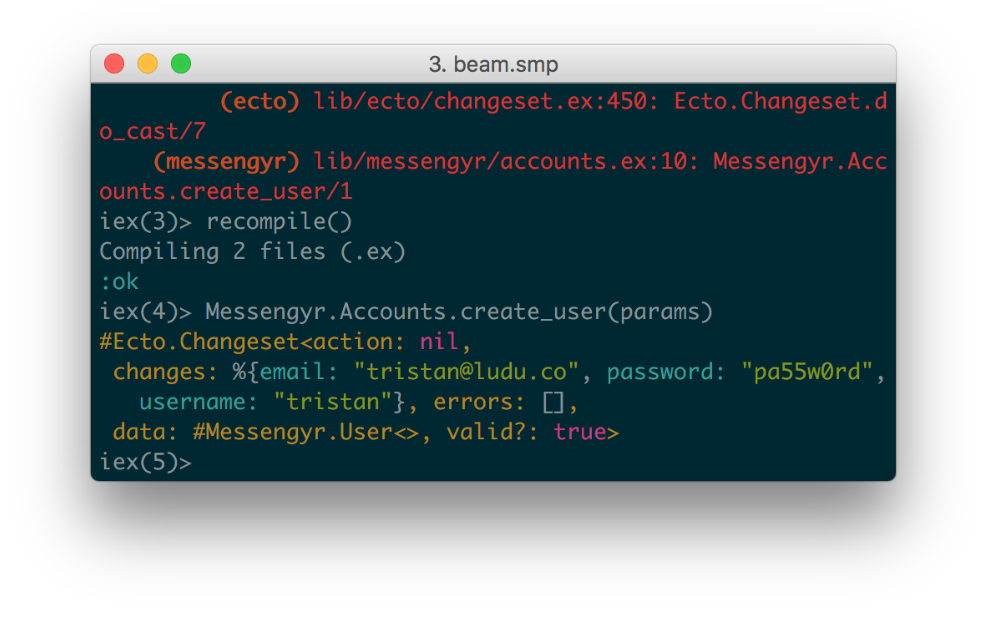
endNow recompile, try again, and you should get a valid changeset with all the fields:
While we're at it, we also want to make sure that these fields cannot be omitted, so we'll edit our validate_required/2-function so that it uses a list of atoms, instead of only checking for :email.
# lib/messengyr/accounts.ex

# ...

  def create_user(params) do
    %User{}
    |> cast(params, [:username, :email, :password])
    |> validate_required([:username, :email, :password])
  end

  # ...
Finally, now that our changeset is valid, we can finish off by using our "Repo" module to insert the record into the database:
# lib/messengyr/accounts.ex

defmodule Messengyr.Accounts do

  # ...

  # Make sure that you alias the module first:
  alias Messengyr.Repo

  def create_user(params) do
    %User{}
    |> cast(params, [:username, :email, :password])
    |> validate_required([:username, :email, :password])
    |> Repo.insert # ...and add this line
  end

end
Recompile one last time, and try calling the function again!
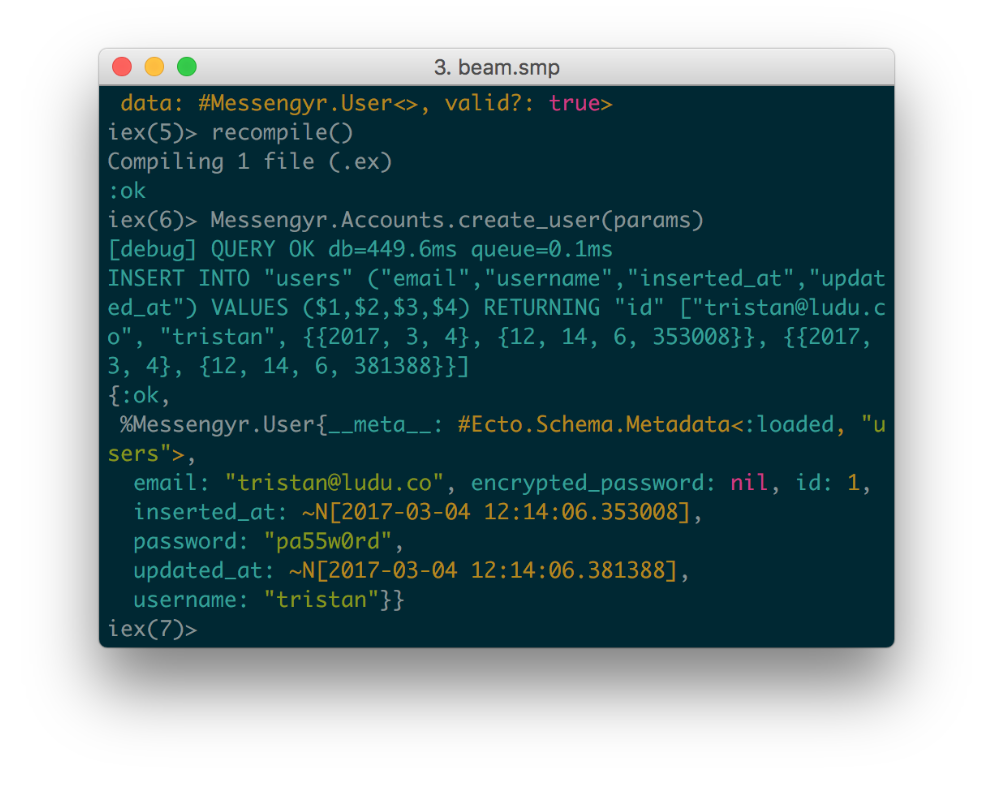 When you run "Repo.insert", you get a preview of the SQL that's being executed. Cool!
Look at that! Instead of getting {:error, changeset} like before, we now got {:ok, user} with the user struct that was just added! You can see that the inserted_at and updated_at-fields have also been populated automatically.
And if you check your database...
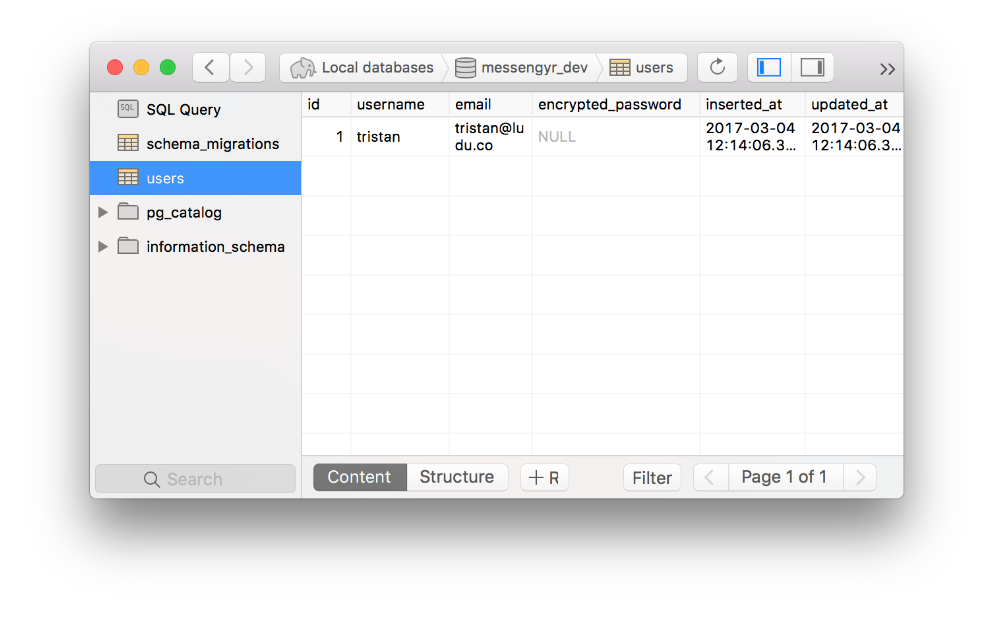 There's our data!
Adding context
Before we move on to the next lesson, we're going to make a little change to our folder structure. As you can see, our User and Accounts modules are pretty connected -- Accounts is really just like an interface for doing things with User.
Since Phoenix 1.3, developers are encourages to group modules that belong together into so-called "contexts". The context in this case is the Accounts module -- it's the "public API" that we will use whenever we want to create, update or delete users in the future.
In order to reflect that, we're going to** create a new folder** inside lib/messengyr called accounts, where we will put both accounts.ex and user.ex. Your lib/messengyr folder should look like this after the change:
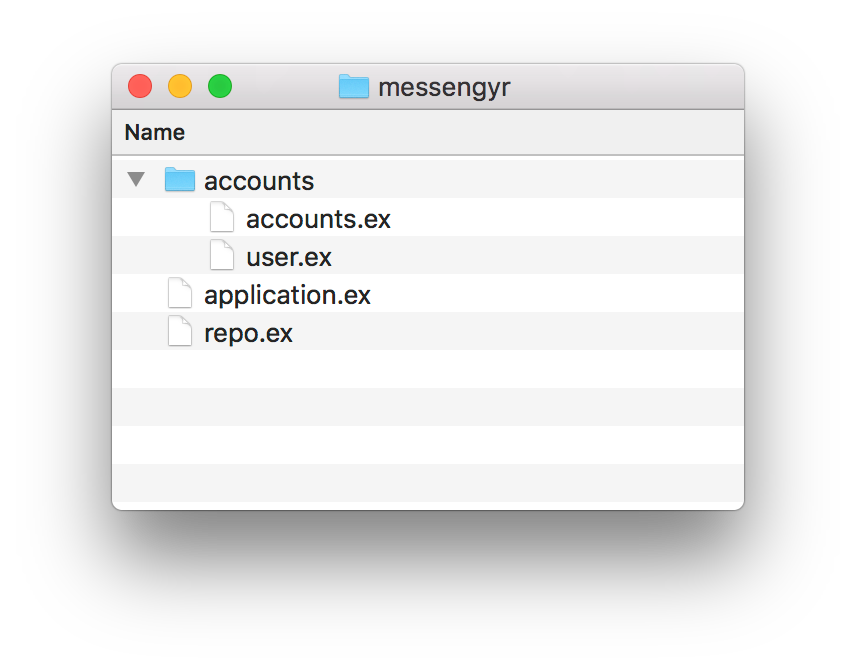 Nice and organized!
To reflect this new hierarchy, we're also going to change the User module's namespace from Messengyr.User to Messengyr.Accounts.User:
# lib/messengyr/accounts/user.ex

defmodule Messengyr.Accounts.User do # Update this line!
  # ...
...and since we've done that, we also need to update the alias statement in accounts.ex:
# lib/messengyr/accounts/accounts.ex

defmodule Messengyr.Accounts do

  # ...

  alias Messengyr.Accounts.User # Update this line!

  # ...
That's all! Your create_user/1-function should still work in exactly the same way as before. In the next chapter, we're going to back to see how we can let the user call this function after they've filled in a form.