Authentication in an Ethereum DApp is usually very different from other authentication systems that you find in traditional web apps.
Since all the information stored on the blockchain is completely public, it would make no sense to store passwords, or even hashes of passwords for our user accounts. Instead, a good strategy is to rely on our user's unique Ethereum address.
The well-known DApp "CryptoKitties" does this in a clever way. In order to sign up, you need to sign a message using one of your MetaMask wallet's addresses -- proving that you own the corresponding private key. It will then create your account by storing your given user info and address in their database.
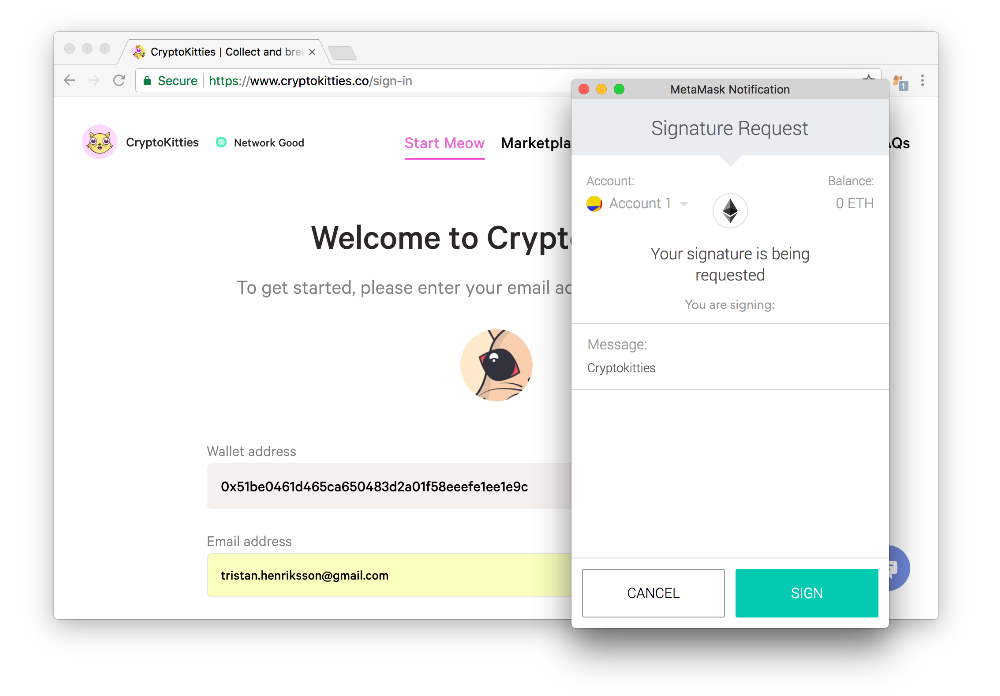 CryptoKitties' login system.
The good thing with this is that signing a message is completely free, so you don't need to worry about gas costs from the user's perspective.
In our DApp however, we are storing the user info on the blockchain (more precisely, in the UserStorage contract), and not in our own private database. Signing a message will therefore not be enough. We will however use the same concept of associating an Ethereum address to a user profile.
Updating our contracts
As you might have noticed from our registration form in the Next.js app, we're collecting some additional information that we're not yet handling in our contracts -- the user's first name, last name, bio and their Gravatar email (to display a profile picture).
Let's update our UserStorage contract to take these new fields into account:
// contracts/users/UserStorage.sol

// ...

contract UserStorage is BaseStorage {

  // ...

  struct Profile {
    uint id;
    bytes32 username;
    bytes32 firstName;
    bytes32 lastName;
    string bio;
    string gravatarEmail;
  }

  // ...

}
To make our DApp work, we also want to be able to find a profile based on a username or an address, so we'll add two more mappings, each pointing to a user ID:
// contracts/users/UserStorage.sol

// ...

contract UserStorage is BaseStorage {

  mapping(uint => Profile) public profiles;
  mapping (address => uint) public addresses; // <-- Add this
  mapping (bytes32 => uint) public usernames; // <-- ...and this

  // ...

}
Now that we've updated the profile structure, we also need to update the createUser function that's in UserStorage.sol. Apart from taking into account the new fields, we'll also populate the two new mappings every time a new user is added:
// contracts/users/UserStorage.sol

// ...

contract UserStorage is BaseStorage {

  // ...

  function createUser(
    address _address,
    bytes32 _username,
    bytes32 _firstName,
    bytes32 _lastName,
    string memory _bio,
    string memory _gravatarEmail
  ) public onlyController returns(uint) {
    latestUserId++;

    profiles[latestUserId] = Profile(
      latestUserId,
      _username,
      _firstName,
      _lastName,
      _bio,
      _gravatarEmail
    );

    addresses[_address] = latestUserId;
    usernames[_username] = latestUserId;

    return latestUserId;
  }

}
Finally, we'll also update our controller function in UserController.sol. In it, we first do some checks to make sure that neither the user's address or desired username is taken, before we send all the relevant information to the storage function.
// contracts/users/UserController.sol

// ...

contract UserController is BaseController {

  function createUser(
    bytes32 _username,
    bytes32 _firstName,
    bytes32 _lastName,
    string memory _bio,
    string memory _gravatarEmail
  ) public returns(uint) {
    ContractManager _manager = ContractManager(managerAddr);

    address _userStorageAddr = _manager.getAddress("UserStorage");
    UserStorage _storage = UserStorage(_userStorageAddr);

    require(_storage.addresses(msg.sender) == 0);
    require(_storage.usernames(_username) == 0);

    return _storage.createUser(
      msg.sender,
      _username,
      _firstName,
      _lastName,
      _bio,
      _gravatarEmail
    );
  }

}
If you try to run truffle test on this, you'll notice that TestUserStorage fails.
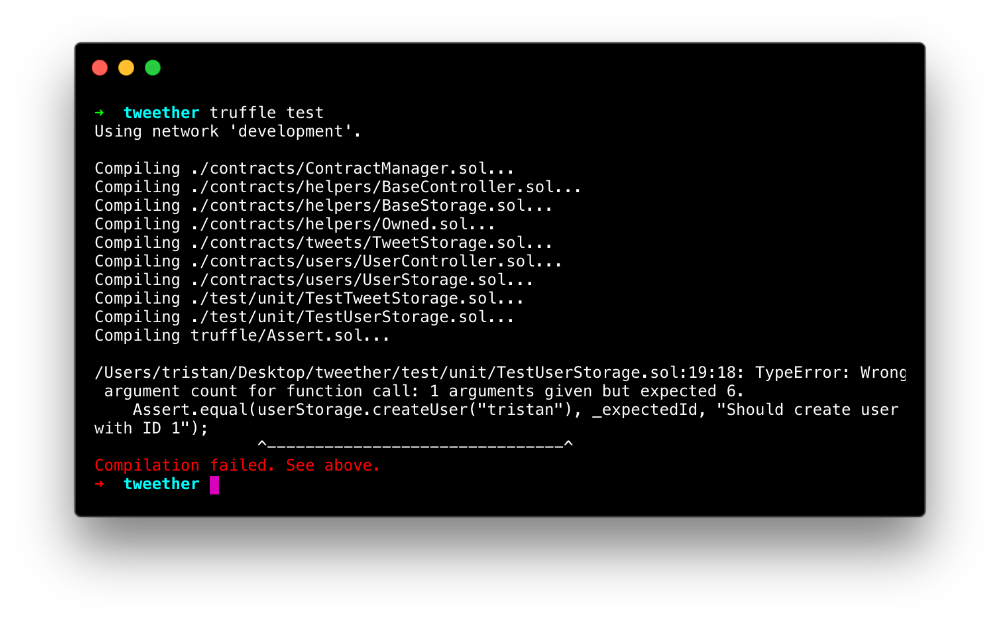 We've got more parameters in our "createUser" function now!
Therefore, let's update both our unit and integration tests so that they take these new fields into account.
// test/unit/TestUserStorage.sol

// ...

contract TestUserStorage {

  // ...

  function testCreateFirstUser() public {
    uint _expectedId = 1;

    Assert.equal(userStorage.createUser(
      address(0),
      "tristan",
      "Tristan",
      "Williams",
      "I like building stuff",
      "example@example.com"
    ), _expectedId, "Should create user with ID 1");
  }

  // ...
}
// test/integration/users.js
// ...
contract('users', () => {
it("can create user with controller", async () => {
const controller = await UserController.deployed()
const tx = await controller.createUser(
"tristan",
"Tristan",
"Williams",
"I like building stuff",
"example@example.com"
)
assert.isOk(tx)
})
it("can't create user without controller", async () => {
const storage = await UserStorage.deployed()
try {
const tx = await storage.createUser(
0x0,
"tristan",
"Tristan",
"Williams",
"I like building stuff",
"example@example.com"
)
assert.fail();
} catch (err) {
assertVMException(err);
}
})
// ...
})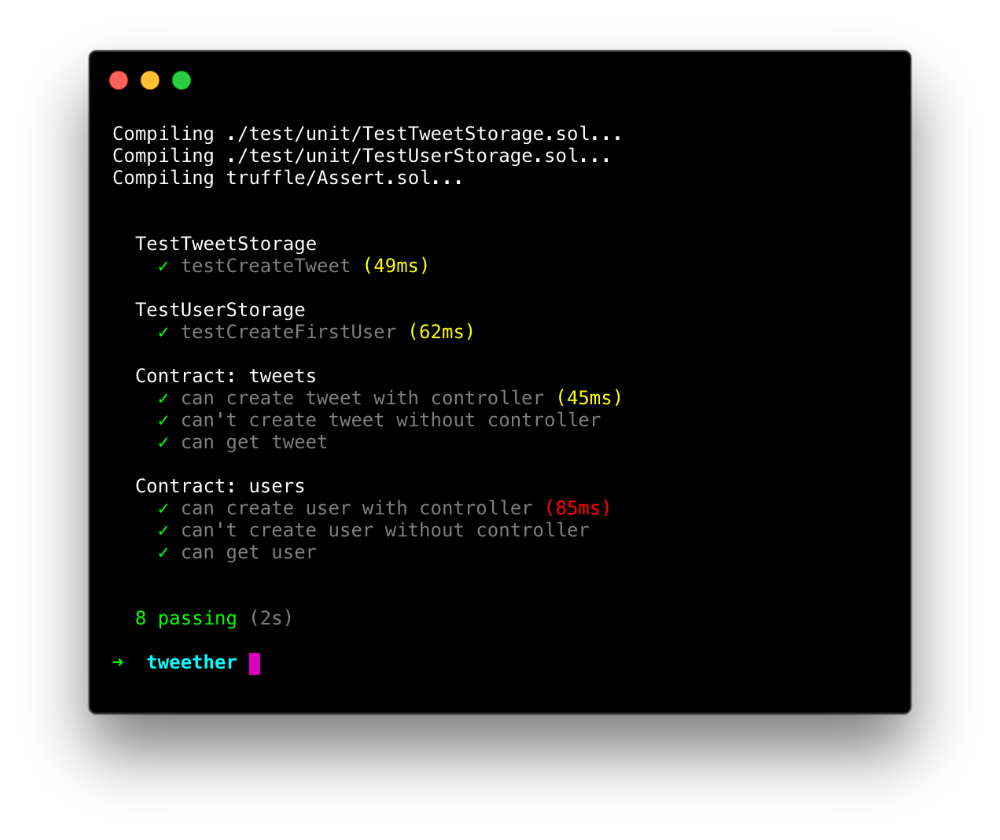 There we go!
Re-deploying our contracts
If we had already deployed our contracts to the production environment, the updates made to UserStorage would pose a problem, since redeploying that contract would clear all the data.
In this case though, since we're still working with our local Ethereum instance, we can simply stop the process running ganache-cli with Ctrl + C, and then relaunch it again, to get a brand new blockchain where the contracts have not been deployed yet. Being able to start from a blank state is sometimes very desirable during the development process!
After restarting your ganache-cli instance, you can redeploy your contracts using:
truffle migrateWe'll also run npm run dev again so that our contract artifacts get recompiled with the new changes we've made.
The only downside with this technique is that your fake MetaMask funds from earlier will be back to zero (since the blockchain is completely reset). You will therefore have to send some funds to it again as we did in the chapter "Using MetaMask".
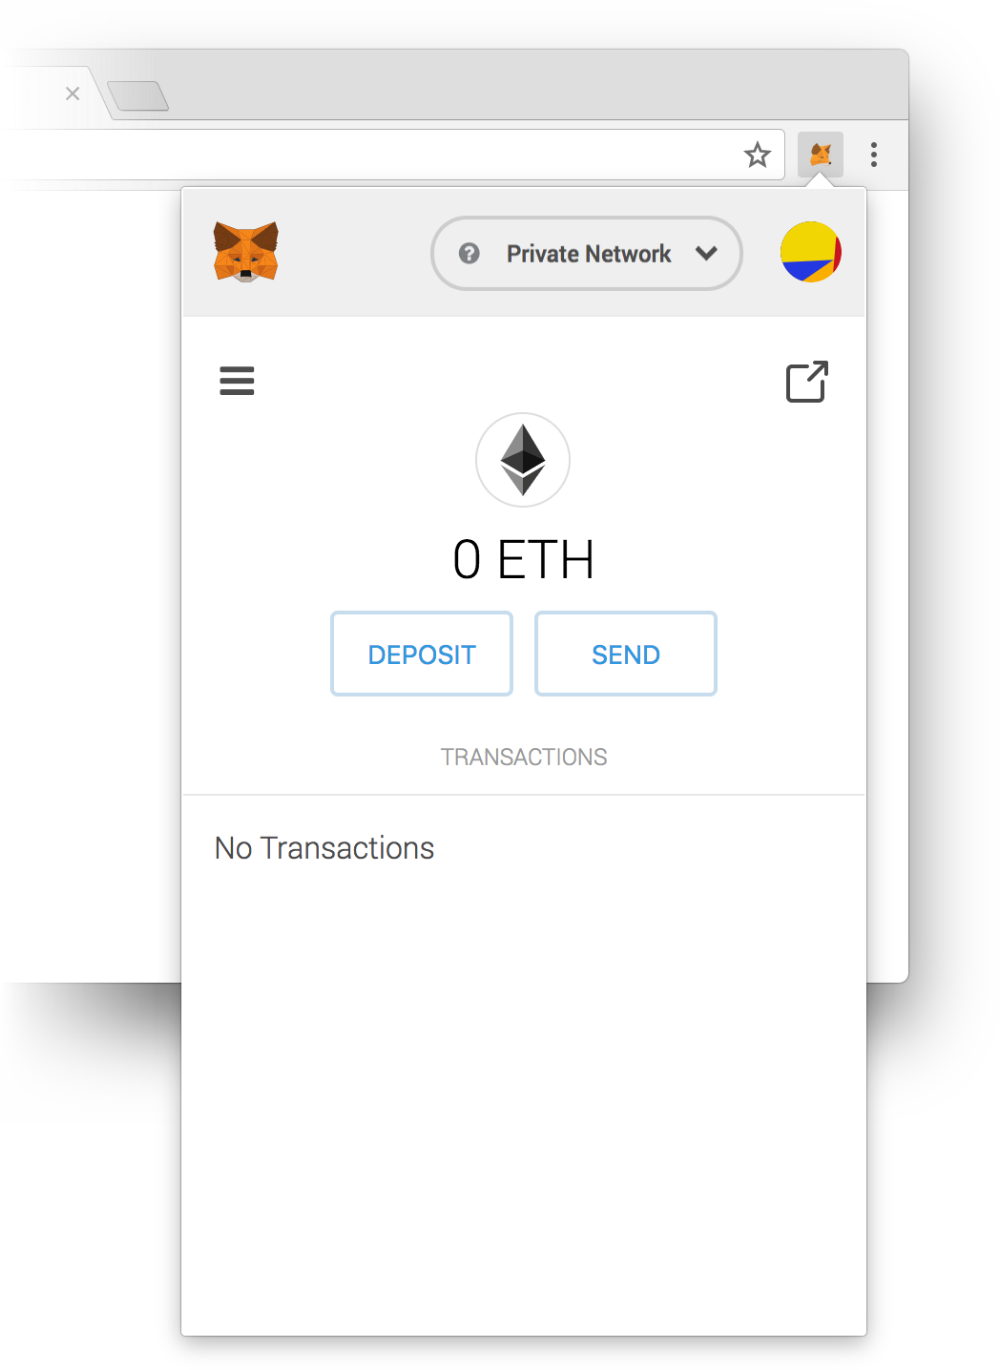 Back to zero!
To do this, run truffle console in a new terminal window and run the following commands (replacing YOUR_METAMASK_ADDRESS with your own MetaMask wallet address obviously):
> const addresses = await web3.eth.getAccounts()
> web3.eth.sendTransaction({ from: addresses[1], to: "YOUR_METAMASK_ADDRESS", value: web3.utils.toWei("90", 'ether')});
Now your MetaMask wallet should be topped up and ready to go again!
Calling the function with MetaMask
Let's go back to the frontend. We'll first open the file web3/users.js and edit the createUser function so that it receives and sends all the parameters needed to create a new profile, and not just the username.
// client/web3/users.js

// ...

export const createUser = async (...params) => {
  try {
    await ethereum.enable()

    const controller = await getInstance(UserController)
    const addresses = await eth.getAccounts()

    const result = await controller.createUser(...params, {
      from: addresses[0],
    })

    return result
  } catch (err) {
    console.error("Err:", err)
  }
}
Next, we add the createUser method in our RegistrationForm. This method will do some lazy checks to make sure we've filled in all the fields, before it calls the createUser function above.
// client/components/RegistrationForm.js

// ...

import { createUser } from "../web3/users"

// ...

export default class RegistrationForm extends React.Component {

  // ...

  createUser = async (e) => {
    e.preventDefault()

    // Some quick validation checks
    for (let key in this.state) {
      if (!this.state[key]) {
        return alert(`You must fill in your ${key}!`)
      }
    }

    const { firstName, lastName, username, bio, gravatarEmail } = this.state

    try {
      // Open the MetaMask modal:
      await createUser(username, firstName, lastName, bio, gravatarEmail)

      alert("Your user has been created!")
    } catch (err) {
      alert(`Sorry, we couldn't create your user: ${err}`)
    }
  }

  render() {
    // ...
  }

}
With this, you should now be able to fill in the form, make a MetaMask transaction and create your user!
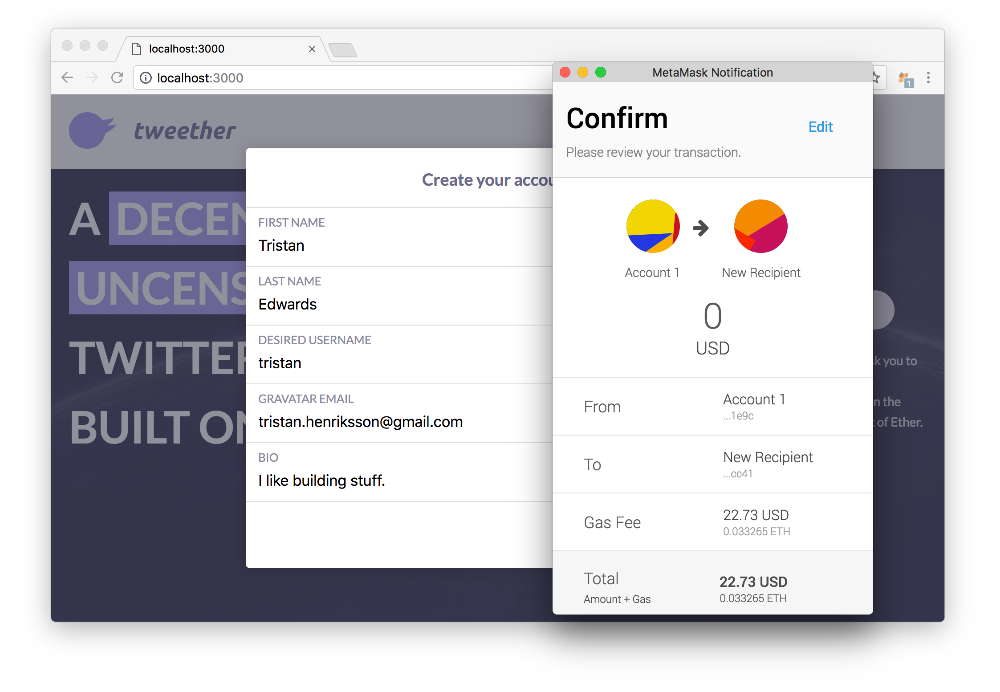 The MetaMask modal should pop up when you press "Create"...
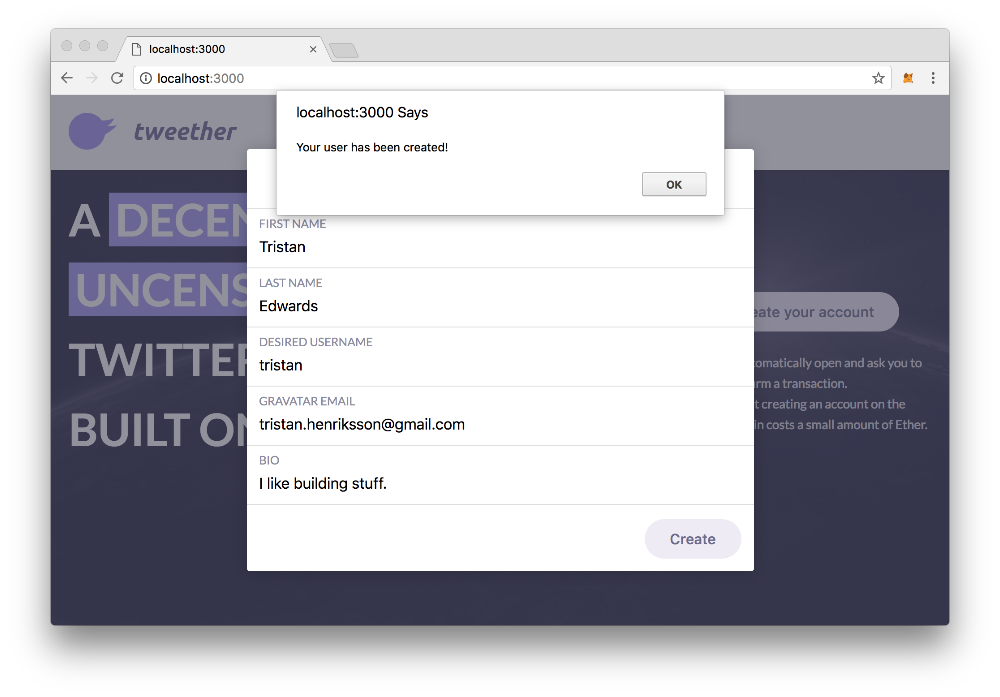 Awesome!
As you can see, there are clear drawbacks to forcing the user to create their profile on the blockchain. Paying $22.73 (although the amount might vary depending on how busy the network is) to create a user is probably not something that many people are willing to do. It's therefore completely understandable why apps like CryptoKitties have taken a more traditional and centralised approach to data storage.
Now that you know how the decentralised version of account creating works, it's up to you to decide exactly what data makes sense to have on the blockchain for your own app! One mix-and-match variant could be to only save the user ID and address on the blockchain, while storing the rest on a good ol' SQL database for example. For the sake of brevity, we won't do that in this course though.
Authenticating the user
So we now have a newly created profile, but from the end-user's perspective, everything still looks the same. The next step in the process it to log in.
But wait...

No need to log in? How is that possible?
It turns out that your MetaMask account is your login. As we saw before, once you've unlocked your MetaMask wallet, any DApp can see what address you're currently using thanks to eth.getAccounts(). If they know your address, they know your account.
This is quite different from how web apps usually authenticate users, but it's actually very effective. Imagine no longer having to remember (or generate) unique passwords for every website anymore. Instead, MetaMask is your one and only login. Pretty cool huh?
Now that we know this, let's edit our code so that, as soon as the DApp launches, it checks whether the user's address is connected to any existing user ID in the UserStorage contract.
// client/web3/users.js

// ...

export const getLoggedInUserId = async () => {
  try {
    await ethereum.enable()
    const addresses = await eth.getAccounts()

    if (!addresses) return

    const storage = await getInstance(UserStorage)
    const userId = await storage.addresses.call(addresses[0])

    return parseInt(userId)
  } catch (err) {
    console.error("Err:", err)
  }
}

// ...
Since we want to display the logged-in user's info in the header, we'll do the check in the Header component.
// client/components/Header.js
// ...
import { getLoggedInUserId } from "../web3/users"
export default class Header extends React.Component {
async componentDidMount() {
const userId = await getLoggedInUserId()
console.log("Logged in as", userId)
}
render() {
// ...
}
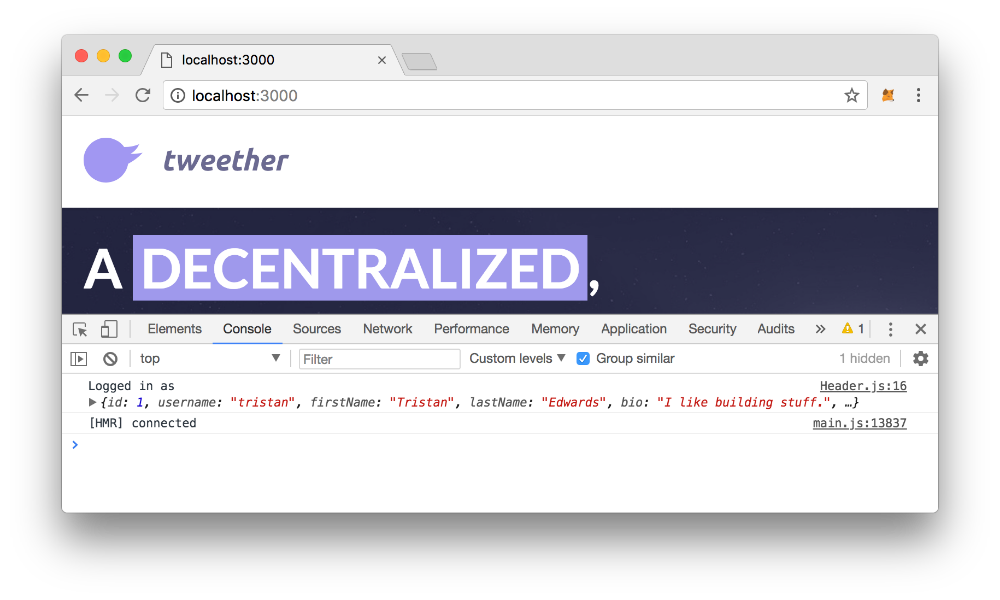
}Refresh the page and you should see your user ID immediately being logged in the JavaScript console (provided that your MetaMask account is unlocked).
 Success!
Displaying the user info
Finally, we want to display the name and avatar for the logged-in user in our header. So using this ID that we have, we want to fetch the rest of the user's information.
We can do this pretty easily simply by changing our existing getUserInfo function in web3/users.js so that it returns all of the fields that we have. The only thing to remember is that we want the info to have some user-friendly formatting, which means converting hex strings to normal strings and BigNumber to integers.
// client/web3/users.js

// ...

export const getUserInfo = async (userId) => {
  const storage = await getInstance(UserStorage)
  const profile = await storage.profiles.call(userId)

  const {
    id,
    username,
    firstName,
    lastName,
    bio,
    gravatarEmail,
  } = profile

  if (!parseInt(id)) throw "Couldn't find user!"

  return {
    id: parseInt(id),
    username: eth.utils.toAscii(username),
    firstName: eth.utils.toAscii(firstName),
    lastName: eth.utils.toAscii(lastName),
    bio,
    gravatarEmail,
  }
}

// ...
To make sure it works, we can import the function into our header and log the full user info instead of just the ID:
// client/components/Header.js

// ...

import { getLoggedInUserId, getUserInfo } from "../web3/users"

export default class Header extends React.Component {

  async componentDidMount() {
    const userId = await getLoggedInUserId()
    const userInfo = await getUserInfo(userId)

    console.log("Logged in as", userInfo)
  }

  // ...

}
There it is!
Alright, we have the info -- now we need to display it. We'll start by adding two state variables -- loggedIn and userInfo. If the loggedIn variable is true, we'll render a new Nav component with the user's first name and last name.
// client/components/Nav.js

import Link from "next/link"

export default ({ userInfo }) => {
  const { firstName, lastName, username } = userInfo

  return (
    <nav>
      <Link href={`/profile?u=${username}`}>
        <a className="username">
          <span>
            {firstName} {lastName}
          </span>
        </a>
      </Link>

      <style jsx>{`
        nav {
          display: inline-block;
          float: right;
        }
        nav button,
        nav a {
          min-height: 33px;
          border: none;
          padding: 7px;
          text-align: center;
          border-radius: 24px;
          display: inline-block;
          vertical-align: middle;
          cursor: pointer;
          margin: 0 10px;
          transition: background-color 0.1s;
          color: inherit;
        }
        nav button:hover,
        nav a:hover {
          background-color: rgba(140,111,193,0.14);
        }
        nav button:focus {
          outline: none;
        }
        .username {
          font-size: 18px;
          text-decoration: none;
        }
        .username span {
          display: inline-block;
          vertical-align: middle;
          margin-left: 10px;
          margin-right: 10px;
        }
        nav :global(svg) {
          margin-bottom: -2px;
        }
      `}</style>
    </nav>
  )
}
// client/components/Header.js
// ...
import Nav from "./Nav" // <-- Add this line
export default class Header extends React.Component {
state = {
loggedIn: false,
userInfo: {}
}
async componentDidMount() {
const userId = await getLoggedInUserId()
try {
const userInfo = await getUserInfo(userId)
this.setState({
loggedIn: true,
userInfo,
})
} catch (err) {
console.error("Couldn't find logged in user", err)
}
}
// ...
render() {
const { loggedIn, userInfo } = this.state
return (
<header>
<Center>
<Link href="/">
{/* ... */}
</Link>
<nav>
{loggedIn && (
<Nav
userInfo={userInfo}
/>
)}
</nav>
</Center>
{/* ... */}
</header>
)
}
}As you can see in the Nav component, we've added a link to a profile page with the username as a query parameter. This page obviously doesn't exist yet, but we'll create it in an upcoming chapter.
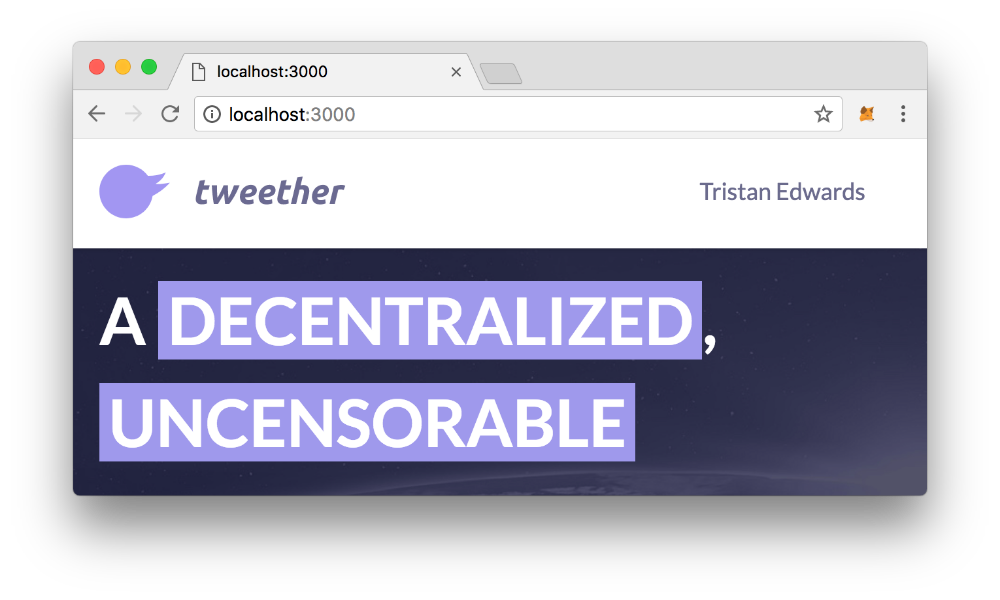 If you refresh, you should now see your name displayed in the header.
Showing an avatar
To top it off, we also want to render the user's profile picture based on the gravatarEmail that they provided (if no email was provided, we'll just render a default picture).
To make this easy, we install the NPM package gravatar-url.
npm install gravatar-url --saveWe then create a new Avatar component where we simply render the Gravatar image based on an email address.
// client/components/Avatar.js

import gravatarUrl from 'gravatar-url'

import DefaultAvatar from '../icons/avatar.svg'

export default ({ email, size = 32 }) => {
  let url

  if (email) {
    url = gravatarUrl(email, {
      size: size * 2,
    })
  }

  return (
    <div className="avatar">
      {url
        ? <img src={url} />
        : <DefaultAvatar />
      }

      <style jsx>{`
        .avatar {
          display: inline-block;
          vertical-align: middle;
          width: ${size}px;
          height: ${size}px;
        }
        .avatar :global(svg) {
          width: 100%;
          height: 100%;
        }
        .avatar img {
          width: 100%;
          height: 100%;
          border-radius: 50%;
        }
      `}</style>
    </div>
  )
}
Finally we import the Avatar component into our Nav and render it next to the user's name:
// client/components/Nav.js

// ...

import Avatar from "./Avatar" // <-- Add this line

export default ({ userInfo }) => {
  // Add "gravatarEmail" in the list of attributes:
  const { firstName, lastName, username, gravatarEmail } = userInfo

  return (
    <nav>
      <Link href={`/profile?u=${username}`}>
        <a className="username">
          <Avatar
            email={gravatarEmail}
            style={{
              marginBottom: -2,
            }}
          />
          <span>
            {firstName} {lastName}
          </span>
        </a>
      </Link>

      <style jsx>{/*
        ...
      */}</style>
    </nav>
  )
}
And we're done!
You should now have an idea of how to perform authentication checks in Ethereum. The key part to understand that's fundamentally different from traditional web apps, is that your wallet's address is essentially your user account.
In the next chapter, we'll look at how we can let our logged-in user create new tweets through the DApp's interface.