We now have a very basic understanding of the Ethereum network, the Solidity programming language and the Truffle framework. It's time to put together everything we've learned so far and create a DApp that people might actually want to use!
In the next few chapters, we will be working on an app called Tweether -- a decentralised Twitter clone built on Ethereum.
 A mockup of the landing page that we want to build.
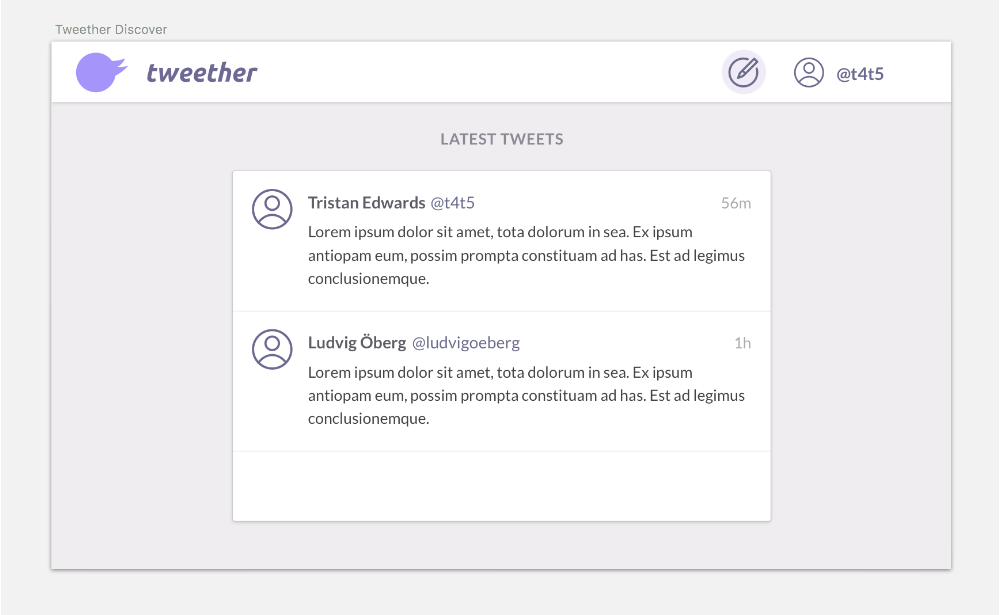 The logged-in experience showing the list of tweets.
The concept is very simple: anyone can sign up using their Ethereum wallet. Once they are logged in, they can post tweets that are stored forever on the immutable blockchain. You should also be able to view other profiles and their tweets.
While this might not exactly be a million-dollar idea, it's pretty cool to have a social network that is impossible to shut down or censor, especially given Twitter's history of censorship.
A note on immutability...
The most important thing to remember when developing for Ethereum is that, once a smart contract is deployed to an address, it can no longer be changed -- the code that sits on that address will be there for all eternity.
At first, this can seem very unpractical. After all, aren't developers known for constantly making mistakes and spending more time fixings bugs than deploying new features? There's no way they could write a perfect smart contract the first time!
Believe it or not, this is actually part of Ethereum's design -- the idea is that if contracts are too easily changeable, they're no longer trustless, and you'd have to trust the intentions of the person maintaining it.
The conclusion is therefore that you shouldn't treat your smart contracts like any other code. Here are some concepts that are especially important when writing in Solidity:
-
KISS (Keep It Simple Stupid). In other words, don't overcomplicate things. What is really the purpose of your smart contract? Why does it even need to be on the blockchain? Are there some features that are better off using a traditional database? The truth is that most good smart contracts out there are incredibly basic, and strive at doing just one simple thing.
-
Decide in advance which parts should be upgradeable, and which parts should not.
-
Test, test, test! This part cannot be stressed enough. You should have tests written for every function of your smart contract before you deploy it to the mainnet.
Planning the structure
Before we start coding, it's worth planning the structure of our DApp based on the features that we want. In Tweether, we want our contracts to be able to:
-
Register new users
-
Find users based on their ID or username, and get their info
-
Post new tweets
-
Find tweets based on different criterias (for example their author) and read them
To accomplish this, we're going to have 5 contracts:
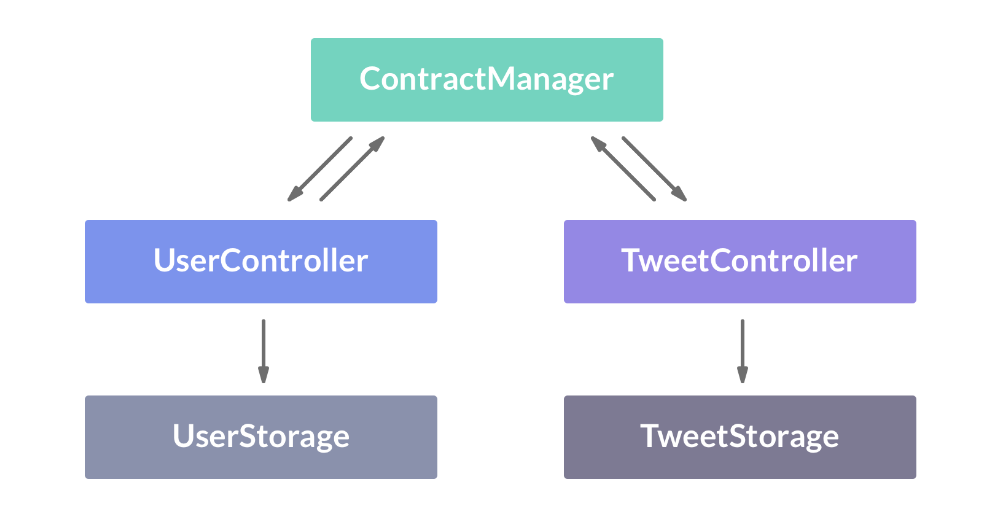
The idea behind our so-called "storage contracts" (like UserStorage and TweetStorage) is that they are never replaced. The reason for this is because their only task should be to store all of our data (the users and tweets). If we were to replace them some time in the future, that data is lost. Storage contracts work pretty much like databases, which is why they're sometimes referred to as "database contracts".
The controller contracts on the other hand are supposed to act as "gatekeepers" for anyone who wants to write to the storage contracts. They are responsible for all the logic and validation that our supplied information will have to go through before it is granted the privilege of being added to the blockchain. These contracts should also have the possibility to be replaced with newer versions if the logic needs to changed in the future.
Finally, we have the "Contract manager", which simply keeps track of the most recent version of each contract, and what address they are deployed to. That way, if the TweetController contract needs to get some info from the UserStorage contract for example, it can always go through the ContractManager.
Creating the UserStorage contract
Now that we have a vague idea of how to build our app, let's get coding! We'll start by creating a new Truffle project, just like we did in the previous chapter:
mkdir tweether
cd tweether
truffle init
The plan is now to create all the contracts that we need, along with their tests, before we start moving on to the user interface. Let's start with our users.
Inside the contracts folder, create a new folder called users. This is where we'll keep everything user-related. Inside that folder, create a new file called UserStorage.sol.
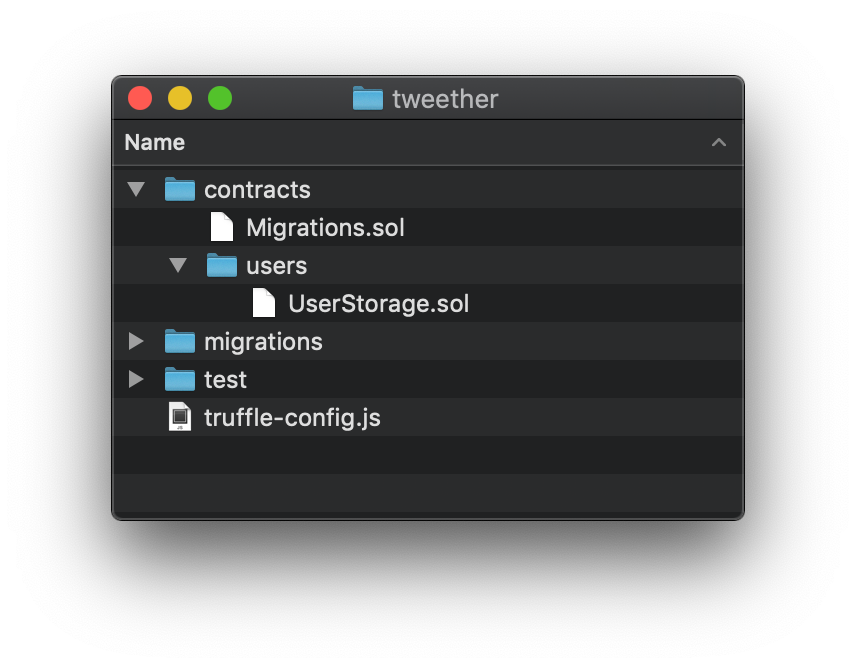 Your project structure should now look like this.
Open your UserStorage.sol file and add the following boilerplate code specifying the Solidity version and the name of the contract. To find out what the latest version of Solidity is, you can check out its GitHub repo.
// contracts/users/UserStorage.sol

pragma solidity ^0.5.10;

contract UserStorage {

}
Next, we're going to create a struct for our users. A struct is basically like a class in object-oriented languages, where you specify a template for objects that you're going to create.
To keep things simple for now, our Profile struct will only have two attributes: idand username:
// contracts/users/UserStorage.sol

pragma solidity ^0.5.10;

contract UserStorage {

  struct Profile {
    uint id;
    bytes32 username;
  }

}
Notice how we need to declare the type of each attribute before naming it. In this case we specify that the id is a uint (unsigned integer), and the username uses bytes32.
You might be wondering why we're not using the string datatype for the username? The reason for this is that usernames are usually not very long, and according to the Solidity documentation:
*"If you can limit the length to a certain number of bytes, always use one of bytes1 to *bytes32 because they are much cheaper."
In this case, we therefore deliberately choose to restrict the username's length to 32 characters in order to save gas costs.
Now we need a way to store these profiles somehow. While we could keep them all in a long array, a mapping is probably more suitable for our use case.
A mapping can be thought of as a hash table -- it's a data structure that stores key-value pairs. Since we want to be able to retrieve a profile based on a given ID, it makes sense to use a mapping that uses the user's ID as a key, and its full Profile object as the value.
// contracts/users/UserStorage.sol

// ...

contract UserStorage {

  mapping(uint => Profile) profiles;

  // ...
Finally, we're going to add a createUser function that creates new Profile structs and adds them to the profiles mapping.
In order for every user to automatically get a uniquely assigned ID, we'll use a latestUserId storage variable which starts off at 00 and increments every time the function is called:
// contracts/users/UserStorage.sol

// ...

contract UserStorage {

  // ...

  uint latestUserId = 0;

  function createUser(bytes32 _username) public returns(uint) {
    latestUserId++;

    profiles[latestUserId] = Profile(latestUserId, _username);

    return latestUserId;
  }

  // ...
Your final contract should now look like this:
// contracts/users/UserStorage.sol

pragma solidity ^0.5.10;

contract UserStorage {

  mapping(uint => Profile) profiles;

  struct Profile {
    uint id;
    bytes32 username;
  }

  uint latestUserId = 0;

  function createUser(bytes32 _username) public returns(uint) {
    latestUserId++;

    profiles[latestUserId] = Profile(latestUserId, _username);

    return latestUserId;
  }

}
Testing our contract in JavaScript
Good work so far! Now, let's see if the functions work as expected by testing them.
Before writing the test files though, remember that we need to write a deploy script so that the UserStorage contract gets deployed on the blockchain and can be interacted with. Let's create a new migration file called 2_deploy_storage.js:
// migrations/2_deploy_storage.js

const UserStorage = artifacts.require('UserStorage');

module.exports = (deployer) => {
  deployer.deploy(UserStorage);
}
Next, in our test folder, we're going to create a new folder: integration. We'll later create another folder called unit in order to separate our JavaScript tests from our Solidity tests.
In integration, we're going to add a file called users.js, whose purpose is to test everything that is user-related.
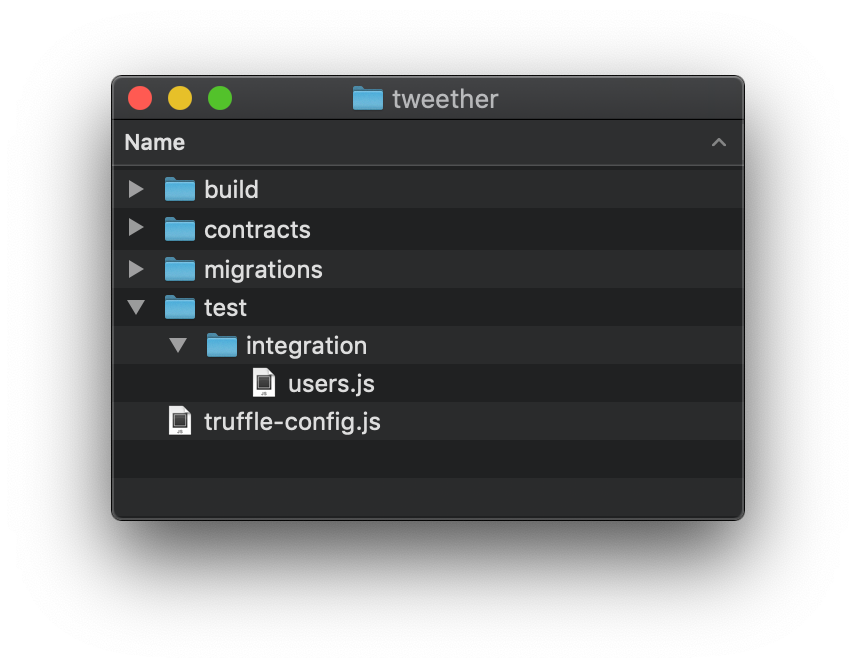 This is what your test folder should look like.
You probably remember how to write JavaScript tests from the previous chapter. We'll start off by calling the createUser function. Remember, since it's a writable function, we cannot use the .call() method.
Another gotcha to remember is that we cannot just pass a normal string value to the createUser function here, since it expects a bytes32 value. Thankfully, the web3 library (which is automatically injected into our test files), has a fromAscii utility function, which makes it trivial to convert string values to bytes32:
// test/integration/users.js

const UserStorage = artifacts.require('UserStorage')

contract('users', () => {

  it("can create user", async () => {
    const storage = await UserStorage.deployed()

    const username = web3.utils.fromAscii("tristan")
    const tx = await storage.createUser(username)

    console.log(tx)
  })

})
As you can see, we haven't written any assertions yet. For now, we just want to log the result to see what we get.
In order for the tests to compile as expected, make sure you use the same settings in your truffle-config.js as you has for the previous project:
// truffle-config.js

module.exports = {
  networks: {
    development: {
     host: "127.0.0.1",
     port: 8545,
     network_id: "*",
    },
  },

  compilers: {
    solc: {
      version: "0.5.10",
    }
  }
}
Now let's get testing! Open a new terminal window and run:
truffle test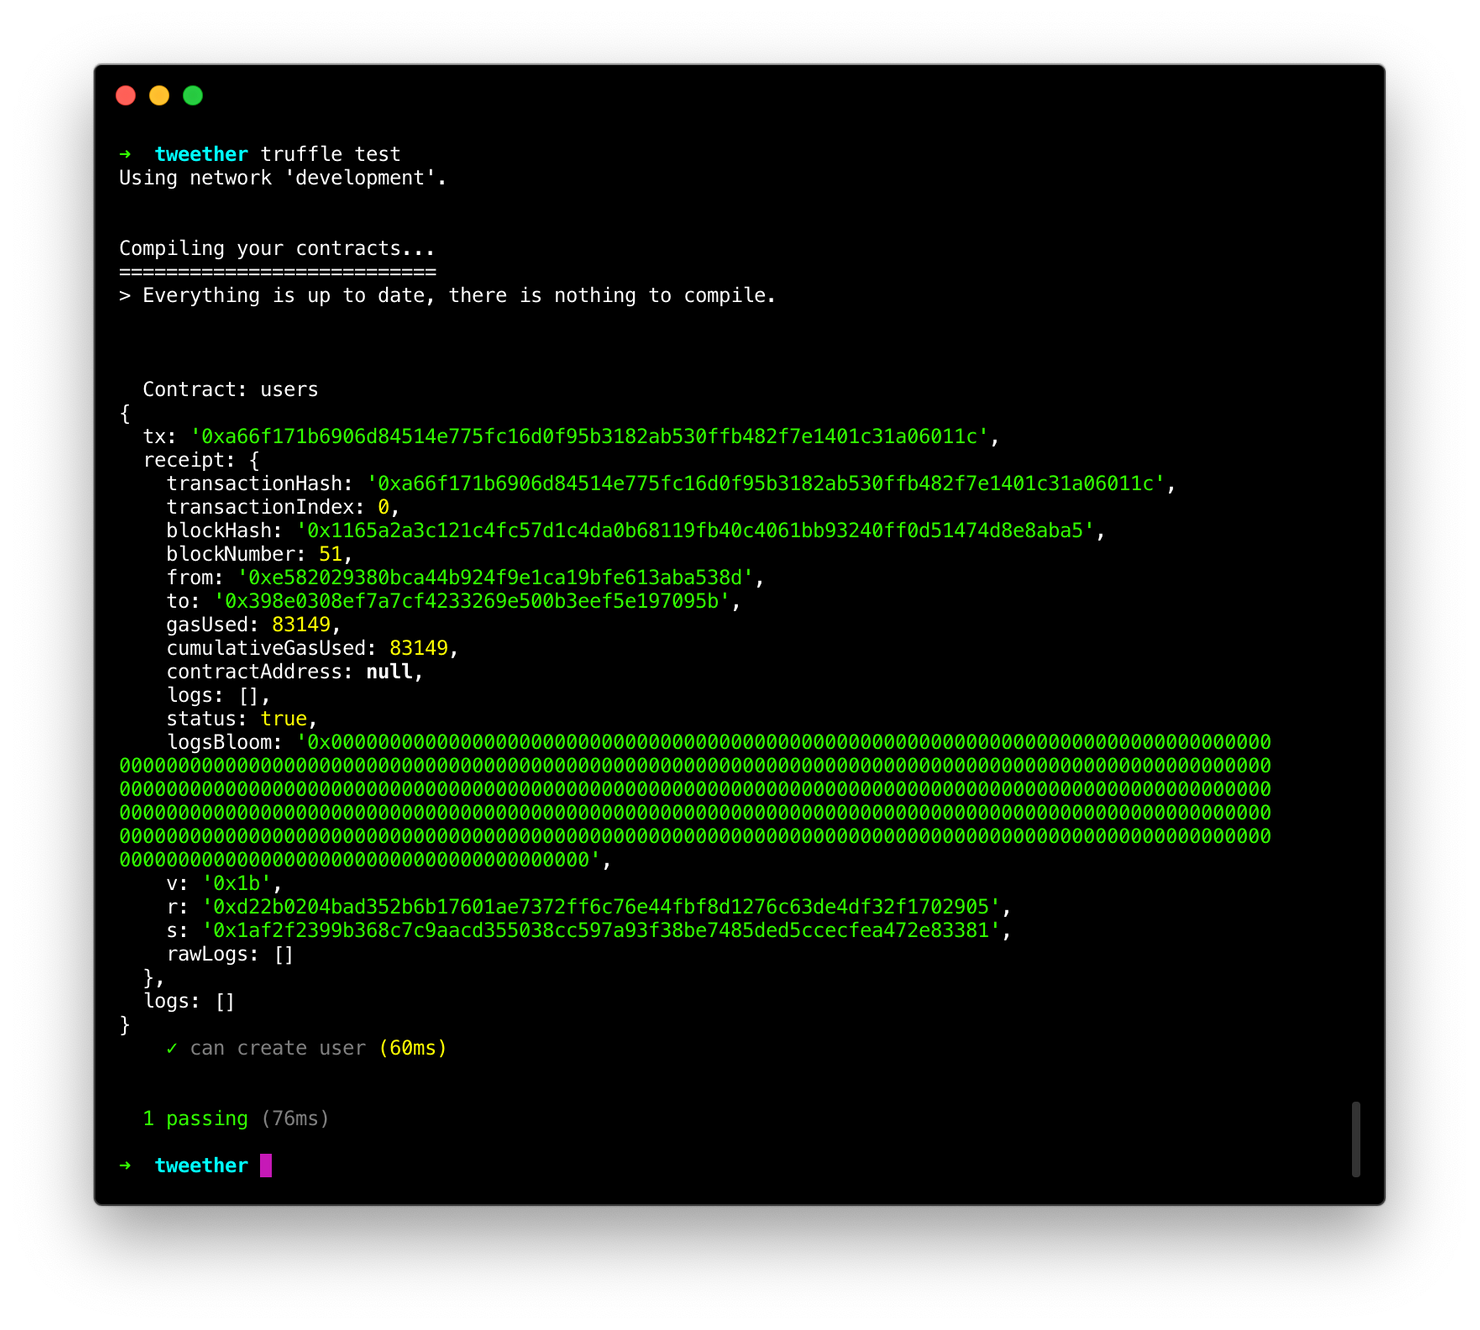 Here's the output of "truffle test".
As you can see, this test does not return the value of the createUser function, which we expected to be the latestUserId variable. Instead, it returns some kind of tx object?
This is again because createUser is a writable function that actively changes the state of the contract. In order to write something to the Ethereum blockchain, a new blockhas to be mined, which means that we need to make a transaction. That transaction data is what we see here.
Since there's no info about the created user ID here, we're going to simply use Chai's isOk assertion, to make sure that the tx object exists:
// test/integration/users.js

it("can create user", async () => {
  const storage = await UserStorage.deployed()

  const tx = await storage.createUser("tristan")

  assert.isOk(tx) // Add this line!
});
If we run the test again, our assertion should go through!
Our first test is now done! However, we would obviously like to check the returned latestUserId to make sure that it's actually 11, and not just know that a transaction was made. For this, we'll need to create a unit test in Solidity instead.
Writing tests in Solidity
Create a unit folder inside test and in it, create a new file called TestUserStorage.soland paste the following code:
// test/unit/TestUserStorage.sol

pragma solidity ^0.5.10;

import "truffle/Assert.sol";
import "truffle/DeployedAddresses.sol";
import "../../contracts/users/UserStorage.sol";

contract TestUserStorage {
  function testCreateFirstUser() public {
    // Get the deployed contract
    UserStorage _storage = UserStorage(DeployedAddresses.UserStorage());

    uint _expectedId = 1;

    Assert.equal(_storage.createUser("tristan"), _expectedId, "Should create user with ID 1");
  }
}
As you can see, a Solidity test is simply a contract which imports another contract, runs one of its functions, and uses Truffle's own Assert library to check the returned value.
There are a couple of things to note here:
-
All contract names related to testing (like
"TestUserStorage") must start withTest(with an uppercase "T") -
All function names related to testing (like
"testCreateFirstUser") must start withtest(with a lowercase "t") -
We use the
DeployedAddresseslibrary to make sure that we get the last deployed instance of theUserStoragecontract. -
The
Assert.equalfunction takes three parameters: the value that we want to check, the expected value to check against and a string describing what the test does.
Run truffle test once more, and you'll now see both tests passing, assuring us that a transaction was created, and that the first created user gets an ID of 11:
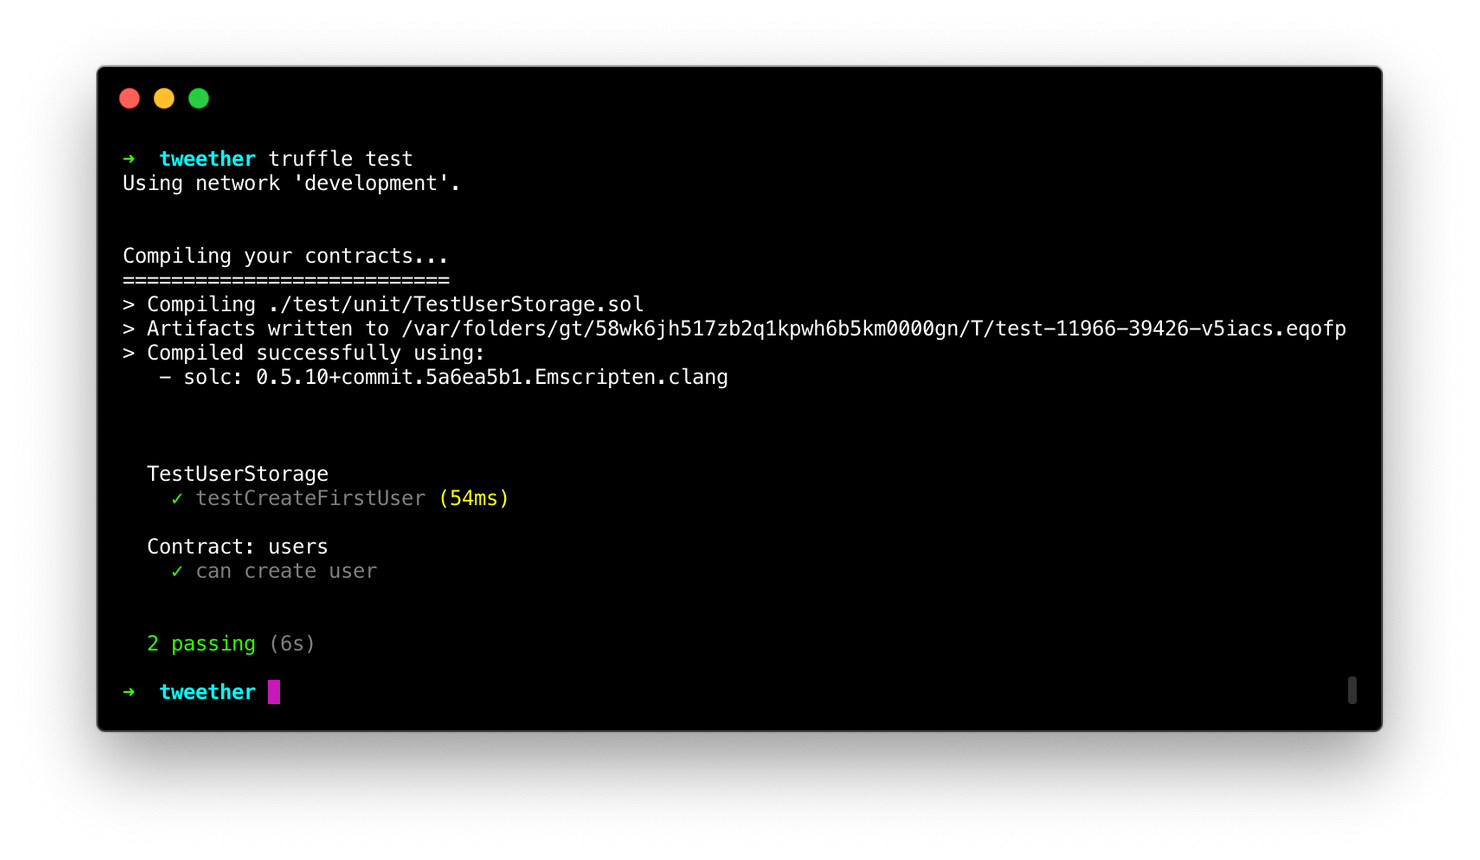 Yay!
Yay!
You've now written both an integration test and a unit test for your DApps first smart contract. Hopefully, you've learned that while it can be tempting to write all tests in JavaScript, there are sometimes limitations to what you can check when going through a virtual machine. Therefore, a good mix of JavaScript tests and Solidity tests is usually the key to writing secure DApps.
In the next chapter we will continue building our contracts in a test-driven manner.